Home Blog Page 2

Freida McFadden Books in Order: Ultimate 2026 Guide

0

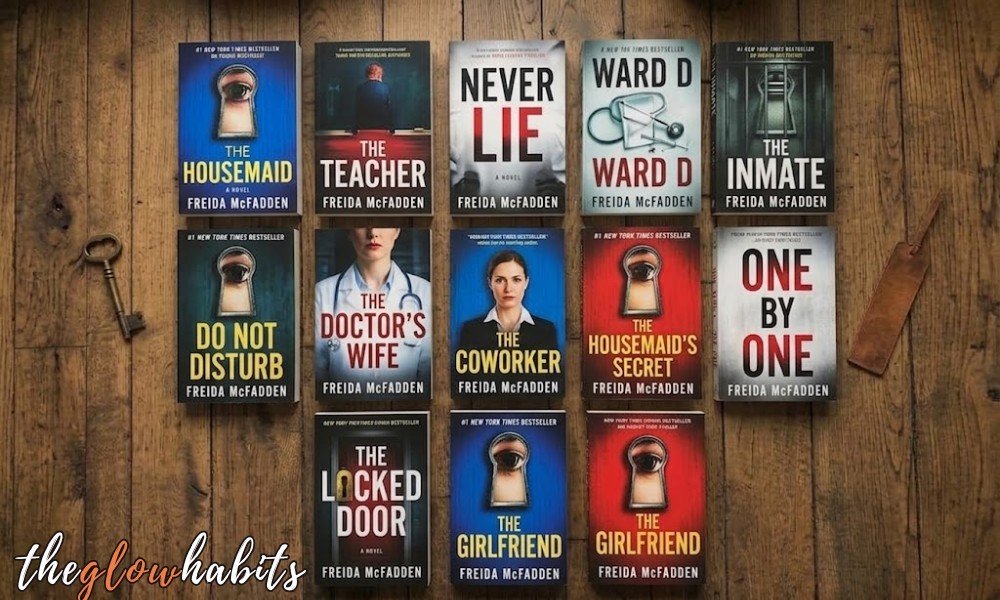
What order should you read Freida McFadden’s books? Most are standalones that work in any order, but completionists should follow publication order and read the Housemaid stories as The Housemaid, The Housemaid’s Secret, The Housemaid’s Wedding, then The Housemaid Is Watching.

Last reviewed: September 7, 2026. Titles and scheduled dates were checked against Freida McFadden’s official printable booklist and official book catalog.

Opening a catalog this large can feel less like choosing a thriller and more like solving one. The good news is simple: you do not need to read every Freida McFadden novel in sequence. Her connected series have a clear order, while the standalone books let you begin with whichever premise grabs you first.

This spoiler-free guide gives you the complete publication sequence, the correct Housemaid reading order, the newest 2026 releases, and practical starting points for different reading moods.

Complete Freida McFadden Books in Publication Order

The table below follows the year each story first appeared, even when a revised edition later received a new title. It contains all 34 titles on the current official catalog, including the forthcoming The Witch. Revised editions and traditional reprints are not counted as new books.

No.YearTitleType or seriesReading note
12013The Devil Wears ScrubsDr. Jane McGill #1Best read before The Devil You Know
22014Dead Med (first published as Suicide Med)Medical thrillerRewritten and released under the current title in 2024
32015Baby CityWomen’s fiction; co-written with Kelley StoddardStandalone
42016Brain DamageMedical thrillerStandalone
52017The Devil You KnowDr. Jane McGill #2Read after The Devil Wears Scrubs
62018The Surrogate MotherPsychological thrillerStandalone
72019The ExPsychological thrillerStandalone
82019The Perfect SonPsychological thrillerStandalone
92020The Wife UpstairsPsychological thrillerStandalone
102020One by OnePsychological thrillerStandalone
112021Want to Know a Secret?Psychological thrillerStandalone
122021The Locked DoorPsychological thrillerStandalone
132021Do Not DisturbPsychological thrillerStandalone
142022Do You Remember?Psychological thrillerStandalone
152022The HousemaidHousemaid #1Start the series here
162022The InmatePsychological thrillerStandalone
172022Never LiePsychological thrillerStandalone
182022The GiftShort storyStandalone quick read
192023The Housemaid’s SecretHousemaid #2Read after The Housemaid
202023Ward DMedical thrillerStandalone
212023The CoworkerWorkplace thrillerStandalone
222024The TeacherPsychological thrillerStandalone
232024The Housemaid Is WatchingHousemaid #3Third full-length Housemaid novel
242024The Widow’s Husband’s Secret LieSatirical novellaStandalone
252024The BoyfriendPsychological thrillerStandalone
262024The Housemaid’s WeddingHousemaid short storyFits between Books 2 and 3
272025The CrashPsychological thrillerStandalone
282025The TenantPsychological thrillerStandalone
292025Death RowShort storyStandalone quick read
302025The IntruderPsychological thrillerStandalone
312026Dear DebbiePsychological thrillerPublished January 27, 2026
322026The Dinner PartyInteractive short storyPublished April 1, 2026
332026The DivorcePsychological thrillerPublished May 26, 2026
342026The WitchPsychological thrillerScheduled for October 6, 2026

The out-of-print 2015 anthology 11 out of 10 is not treated as a standard McFadden title because she contributed only some of its stories. Her official FAQ also explains that The Psyching was expanded into Ward D, so it is not counted as a separate current book.

How This Publication Order Handles Reprints

Many early Freida McFadden books began as self-published editions and were later released by traditional publishers. A new cover, format, or publisher does not create a new place in the reading order when the story remains essentially the same.

Dead Med needs a special note. McFadden first published it as Suicide Med in 2014, then rewrote and shortened it before releasing it as Dead Med. Her official FAQ says the revision is about 20 percent different. This guide places the story in 2014, identifies the new title, and does not count the revised edition twice.

The table therefore answers two different questions clearly: “When did this story first appear?” and “What title can I find now?” For exact formats and current availability, use the author’s official catalog because paperback, hardcover, audiobook, and Kindle Unlimited listings can change.

The Housemaid Series in Reading Order

Reading positionTitlePublication yearEssential?
1The Housemaid2022Yes
2The Housemaid’s Secret2023Yes
2.5The Housemaid’s Wedding2024Optional short story
3The Housemaid Is Watching2024Yes

McFadden’s official series page lists the same four stories. Her FAQ says they can technically be read separately, but the experience is better in order because later books can reveal earlier developments.

The Housemaid

Millie accepts a live-in housemaid job with Nina and Andrew Winchester, hoping the position will give her a fresh start. Instead, the elegant home, unsettling family behavior, and attic bedroom that locks from the outside turn the job into a trap. This is the natural first Freida McFadden book for readers who want domestic suspense, an unreliable perspective, and a final reveal that changes the meaning of earlier scenes.

The Housemaid’s Secret

Millie begins another cleaning job, this time in the Garricks’ penthouse. She has not met Mrs. Garrick, hears crying behind a closed door, and finds blood on white nightgowns. The sequel keeps Millie’s hidden past in play while shifting the danger to a new household. Read it second because its character history assumes you know the first book.

The Housemaid’s Wedding

This winter-themed short story bridges the emotional space between The Housemaid’s Secret and The Housemaid Is Watching. Millie should be celebrating her wedding, but someone wants to stop her from living long enough to take her vows. It is optional, quick, and best placed between Books 2 and 3; reading it afterward as a flashback also works.

The Housemaid Is Watching

Millie has moved from cleaning other people’s houses to owning a family home in a quiet cul-de-sac. New neighbors, a watchful maid, a shadowy figure, and her husband’s late-night absences make that hard-won safety feel fragile. This is Book 3 and the third full-length Housemaid novel. It can be understood on its own, but reading the earlier books first avoids spoilers and gives Millie’s history more weight.

Other Freida McFadden Series

Dr. Jane McGill Series

Read The Devil Wears Scrubs before The Devil You Know. These books lean more toward medical comedy and women’s fiction than psychological terror. They are a good choice when you want hospital pressure, sharp workplace observations, and satire without the darker atmosphere of the later thrillers.

Medical Thrillers: Dead Med and Brain Damage

Dead Med and Brain Damage are sometimes grouped together as the Prescription: Murder books, although McFadden’s current official catalog lists them among her standalone thrillers. Read them in either order; their plots are independent. Both use medical settings to create psychological pressure and suspense.

Which Freida McFadden Book Should You Read First?

For most readers, start with The Housemaid. It is the clearest introduction to her fast chapters, domestic danger, deceptive characters, and escalating twists. It also opens the series that many readers specifically want to continue.

If you do not want to begin a series, choose Never Lie. It delivers a complete mystery in one book, requires no background, and uses an isolated setting and hidden recordings to keep the story moving.

What you wantStart withWhy it fits
The signature McFadden experienceThe HousemaidDomestic suspense and a connected series
A strong standaloneNever LieIsolated mystery with no setup required
A darker premiseThe InmatePrison setting, past secrets, and psychological tension
Medical suspenseWard DA night in a locked psychiatric ward
Workplace tensionThe CoworkerOffice relationships, suspicion, and murder
Satire and medical humorThe Devil Wears ScrubsLighter tone and an overwhelmed medical intern
A short afternoon readThe Gift or Death RowFast, self-contained stories
A provocative book-club choiceThe TeacherMorally complicated characters and divisive choices
A recent releaseDear Debbie or The DivorceTwo 2026 standalone thrillers

Freida McFadden Books by Reading Mood

Domestic Secrets and Dangerous Relationships

Choose The Surrogate Mother, The Ex, The Wife Upstairs, Want to Know a Secret?, The Teacher, The Boyfriend, The Tenant, or The Divorce when you want ordinary relationships to become steadily more threatening. These books turn homes, marriages, dating, and family expectations into sources of pressure.

Looking to build out your beach bag or summer reading pile? Pair these picks with our best summer books on Kindle Unlimited list for more fast-paced, easy-to-binge reads.

Locked Rooms, Isolation, and Survival

Try One by One, Do Not Disturb, Never Lie, The Inmate, The Crash, or The Intruder when you prefer a tight setting and the feeling that escape is getting harder. This group is built around confinement, environmental danger, or a character who cannot easily trust the people nearby.

Medical, Crime, and Workplace Suspense

Start with Dead Med, Brain Damage, The Perfect Son, The Locked Door, Ward D, or The Coworker for medical risk, criminal suspicion, or professional environments that become unsafe. These titles show the strongest bridge between McFadden’s medical background and her thriller writing.

Memory, Identity, and Reinvention

Choose Do You Remember?, Dear Debbie, or the forthcoming The Witch when you want a story shaped by a damaged identity, a changing public persona, or a past that refuses to stay buried. The Witch is currently scheduled for October 6, 2026, so check its official page before ordering.

Novellas and Short Stories

The short-form route is The Gift (2022), The Widow’s Husband’s Secret Lie (2024), Death Row (2025), and The Dinner Party (2026). They are useful for new readers, busy schedules, and anyone who wants the satisfaction of finishing a complete story in one or two sittings. The Dinner Party is especially distinctive because it uses a pick-your-own-path format.

The Three-Book Test Most Reading Lists Miss

A long author catalog should feel like an invitation, not homework. A practical way to test McFadden’s range is to read one series opener, one isolated standalone, and one medical thriller before committing to the whole list.

Begin with The Housemaid for domestic danger, move to Never Lie for an enclosed mystery, and finish with Ward D for medical tension. These three books expose you to different settings while preserving the quick pacing and psychological uncertainty that connect her work.

Then let your strongest reaction choose the next branch. Continue the Housemaid series if Millie’s story held you, explore the standalone thrillers if the closed setting worked best, or return to the medical books if professional pressure made the suspense feel more believable. The best reading order is ultimately the one that removes indecision.

Who Is Freida McFadden?

Freida McFadden is a bestselling psychological thriller author and physician. Her official biography lists major bestseller recognition, the International Thriller Writers Award, a Goodreads Choice Award, and translation into more than 45 languages.

Her background helps explain the medical settings in Ward D, Brain Damage, Dead Med, and the Dr. Jane McGill books. Her broader reputation, however, rests on accessible psychological thrillers built around hidden motives, unreliable narrators, short chapters, and reversals designed to make readers reconsider what they believed.

Are Freida McFadden Books on Kindle Unlimited?

According to McFadden’s official FAQ, her ebooks are intended to be available through Kindle Unlimited, while paperbacks and audiobooks are sold more widely. Store availability can vary by country, edition, and date, so confirm the exact format on Amazon before subscribing or buying.

If you’re already a Kindle Unlimited subscriber and want more titles to add to your queue beyond McFadden’s catalog, check out our best Kindle Unlimited books of 2026 for picks across every genre, including mystery and thriller.

What to Read After The Housemaid Movie

If you watched the movie first, begin with The Housemaid rather than jumping to the sequel. The novel gives you Millie’s original story and prepares you for The Housemaid’s Secret.

Lionsgate released Paul Feig’s adaptation on December 19, 2025, starring Sydney Sweeney as Millie and Amanda Seyfried as Nina Winchester. The official Lionsgate listing confirms the release and cast, Box Office Mojo reports approximately $400.5 million worldwide, and AP News confirms that a screen adaptation of The Housemaid’s Secret is moving forward. Readers should still expect the book and film to differ in detail and ending.

Content Warnings and Reader Fit

These books are designed as fast commercial thrillers, but their subjects can include abuse, captivity, murder, pregnancy, medical trauma, mental health, and dangerous relationships. Sensitivity differs from reader to reader, and even a spoiler-free recommendation cannot predict every reaction.

Use the author’s official content-warning page before choosing a book if a particular topic could affect your experience. The warnings may reveal plot information, so check only the title you plan to read.

Frequently Asked Questions

What order should I read Freida McFadden’s books?

Most Freida McFadden books are standalones and can be read in any order. Use publication order if you want her complete writing journey, and keep each connected series in sequence.

What is the correct Housemaid series order?

Read The Housemaid, The Housemaid’s Secret, The Housemaid’s Wedding, and The Housemaid Is Watching. The wedding story is optional but fits best between Books 2 and 3.

Can I skip The Housemaid’s Wedding?

Yes. It is a companion short story rather than a required full-length installment. You can skip it without losing the main plot or read it after Book 3 as a flashback.

Which Freida McFadden book should I start with?

Start with The Housemaid for her signature domestic suspense. Choose Never Lie if you want a complete standalone mystery instead.

Are Freida McFadden’s books connected?

Most are not connected. The Housemaid books and the two Dr. Jane McGill books are the clearest connected series. Dead Med and Brain Damage are sometimes grouped together, but their stories can be read independently.

What was Freida McFadden’s first book?

The Devil Wears Scrubs was her first published book in 2013. It follows a medical intern and has a more comic, satirical tone than her later psychological thrillers.

How many Freida McFadden books are on the current official list?

The official catalog lists 34 titles as of September 7, 2026. That count includes The Witch, which is scheduled for October 6, 2026.

What are Freida McFadden’s newest books in 2026?

The 2026 schedule contains Dear Debbie, The Dinner Party, The Divorce, and The Witch. The first three have been released; The Witch is scheduled for October 6.

Is Dead Med the same book as Suicide Med?

Dead Med is the revised version of Suicide Med. McFadden says she changed the unusual storyline, removed substantial filler, and produced a version that is about 20 percent different.

Are Freida McFadden’s books available as audiobooks?

Her official FAQ says all her books are intended to be available in audiobook format. Check the individual listing because release dates and retailers can vary.

Is The Housemaid worth reading after the movie?

Yes. Reading the novel gives you the original version of Millie’s story, additional detail, and the correct foundation for continuing the book series.

Does Freida McFadden write anything besides psychological thrillers?

Yes. The Dr. Jane McGill books use medical comedy, Baby City is women’s fiction, and The Widow’s Husband’s Secret Lie is a satirical novella.

Final Reading Advice

Start with The Housemaid for McFadden’s best-known domestic-thriller style, or choose Never Lie for a standalone mystery. Follow publication order if you want to see how her writing developed over time.

There is no prize for forcing yourself through a rigid list. Pick the premise that makes you curious, keep the connected stories in order, and let the first irresistible twist decide where you go next.

The Best Heat Protectants for Fine Hair (That Won’t Weigh It Down)

0

Fine hair and heat styling have a complicated relationship. A few years ago, some heat damage from over-styling was enough to make me start taking heat protectant seriously, not just as an extra step, but as something my hair genuinely couldn’t do without. The problem is that most heat protectants aren’t actually designed with fine hair in mind.

If you have fine, straight hair, you know the struggle: most heat protectants are either too heavy, too greasy, or just leave your strands looking flat before you’ve even touched a hot tool. No wonder so many people skip this step entirely.

The good news? There are formulas that protect without the weight-down. Here’s what to look for, how to use it, and which ones are worth your money.

Why Fine Hair Needs a Different Kind of Heat Protectant

Not all heat protectants are created equal, and fine hair is proof of that. Heavy formulas that work beautifully on thick or coarse hair can leave fine strands looking limp, flat, or greasy almost immediately, sometimes before you’ve even finished styling.

This is why mist-based formulas tend to work better than creams for fine hair. A fine mist iljtdig coats the hair without saturating it, so you get protection without the weight. Creams, on the other hand, are easy to overapply, and even a small amount too much can make fine hair feel coated rather than styled.

There’s also the wash-frequency factor to consider. Many people with fine hair stretch out washes for as long as possible, which means whatever product you’re using needs to hold up over several days, not just look good fresh out of the shower. If your go-to shampoo for fine, damaged hair isn’t pulling its weight either, a heat protectant that’s too heavy can make hair look greasy even faster, cutting that stretch even shorter.

What Heat Actually Does to Your Hair

Heat styling doesn’t just change how your hair looks temporarily; it actually alters the hair on a structural level, which is why protection matters no matter what type of hair you have.

When heat is applied, it temporarily breaks the hydrogen bonds within the hair shaft, which is what allows a curling iron or flat iron to reshape it in the first place. Push those temperatures high enough, though, and the effect goes further: research on the chemistry of heat damage shows that once hair crosses a certain heat threshold,

the keratin proteins in the cortex actually begin to denature, losing the strength and elasticity that keep strands resilient. Alongside this, moisture evaporates rapidly from the hair shaft, especially during blow-drying, and repeated moisture loss over time is what leads to dryness, frizz, and brittleness. 

A heat protectant works the way an oven mitt does: rather than blocking heat entirely, a chemistry expert’s breakdown of how these products work explains that they slow down and spread out heat penetration, which helps limit moisture loss and protects both the hair’s outer cuticle and its internal protein structure.

Without that barrier, the heat makes direct, unmitigated contact with your strands every single time you style. Whether you’re reaching for a curling iron made for fine, straight hair or any other hot tool.This is true regardless of hair type or texture. Fine hair isn’t more or less vulnerable to this process than thick or coarse hair; it just shows the effects differently, which is exactly why choosing the right formula matters as much as using one at all.

How to Choose the Right Heat Protectant for Fine Hair

With so many formulas on the market, it helps to know exactly what to check for before adding one to your routine, especially since fine hair has less room for error.

Look for a lightweight formula first. This matters more for fine hair than almost any other factor. A heavy product will weigh hair down regardless of how well it protects against heat, so lightweight should be non-negotiable, not just a nice-to-have.

Check the temperature protection level. Most well-formulated heat protectants are designed to protect up to 450°F, which covers the vast majority of blow dryers, flat irons, and the best curling irons for long, straight hair. If a product doesn’t list a temperature range, that’s worth noting; it makes it harder to know whether it can actually keep up with your tools.

Consider whether silicone-free matters to you. Some silicones can build up on hair over time, especially with frequent use, which may leave fine hair looking weighed down faster. A silicone-free formula isn’t mandatory, but it’s worth factoring in if buildup has been an issue for you before and if it has, working in one of the best clarifying shampoos for fine hair every few washes can help reset things.

Pay attention to how it actually feels once applied. A good heat protectant shouldn’t feel sticky, greasy, or drying once it’s in your hair. If a formula leaves any of those sensations behind even after you’ve worked it through evenly, it’s usually a sign the product isn’t the right match for your hair, no matter how well it performs on paper.

Between the technical specs and how it actually feels once it’s in your hair, both matter just as much as each other.

How to Apply Heat Protectant Correctly

Even the best formula won’t do its job properly if it’s applied at the wrong time; application timing matters just as much as the product itself.

For blow-drying, apply heat protectant to damp hair. This gives the product time to distribute evenly and coat each strand before heat is introduced rather than sitting on top of already-styled hair. Trying to apply it after your hair is already dry means you’re not getting full, even coverage.

For flat irons or curling irons, wait until your hair is fully dry. Unlike blow-drying, direct-contact tools work best when the product has already been absorbed, and the hair isn’t holding onto excess moisture. Applying it to damp hair before straightening or curling can actually interfere with how evenly the tool glides through your hair.

Always check your tool’s temperature against the product’s protection level. If your flat iron runs hotter than what your heat protectant is rated for, you’re not fully protected even if you’ve applied it correctly. Most quality formulas protect up to 450°F, so it’s worth confirming your tool’s settings don’t exceed that.

Getting the timing right takes the same five extra seconds either way; the difference is just whether your hair is actually protected when the heat hits it.

Best Heat Protectant Sprays & Mists for Fine Hair

If you’re leaning toward a mist over a cream, which tends to work better for fine hair, as covered earlier, these are worth adding to your list.

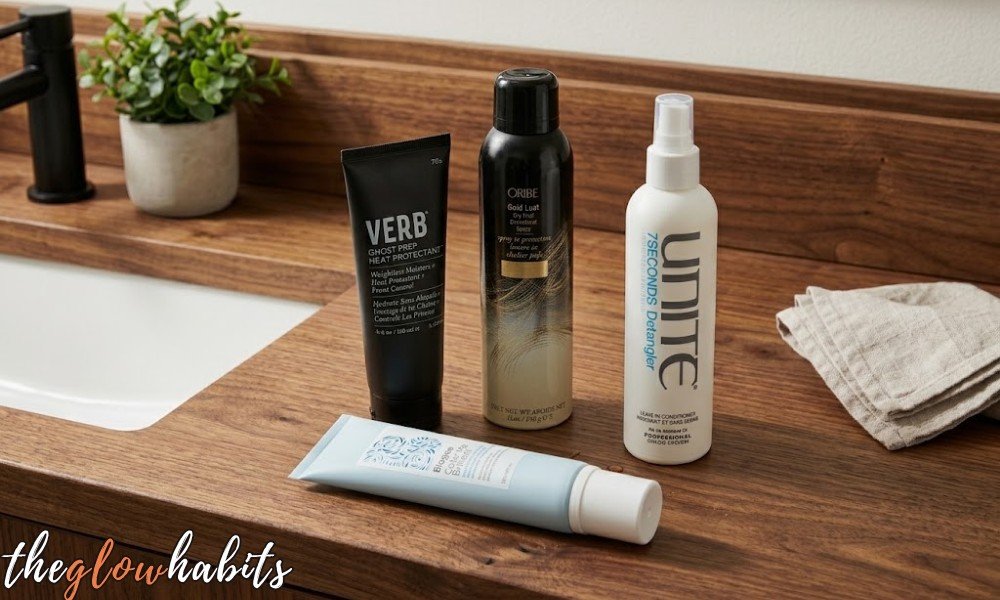
Pure Guardian Angel is a super-fine mist that coats hair without any heaviness, making it a solid all-rounder if you just want reliable thermal protection without extra frills. It works well on both damp hair before blow-drying and dry hair before styling, which makes it flexible enough to fit into most routines.

Another lightweight spray worth trying is one recommended by in-store beauty experts specifically for use on all hair types, including fine; it’s designed to be light enough that it won’t weigh hair down while still holding up through a full styling session.

For something with a bit more finishing power, Oribe Dry Texturising Spray is a cult favourite for a reason. It adds volume to fine hair without making it feel weighed down or frizzy, and the mist sprays evenly without clogging, which matters if you’ve dealt with clogged nozzles on other aerosol products before. It comes with a higher price tag, but a little goes a long way, so one tends to last a while.

Mists like these are a good starting point if your main concern is keeping fine hair from feeling coated or heavy after protecting it.

Best Heat Protectant Creams for Fine Hair

If you’d rather work a product through your hair by hand instead of spraying, a cream formula can still work well for fine hair as long as you’re using the right amount and the right formula.

UNITE 7SECONDS Detangler Leave-In Conditioner is a strong pick if you want a multi-use product. It hydrates and conditions without weighing hair down, and it absorbs effortlessly enough that it doesn’t interfere with styling afterward, which isn’t always the case with heat protectant creams. 

It also helps cut down on tangles throughout the day, which is a common frustration with fine hair, especially on windy days. For best results, apply it to wet or damp hair. If you already have a favourite from our roundup of leave-in conditioners for fine, straight hair, layering it under a light heat protectant is worth testing too.

VERB Ghost Primer is another solid option if you want something with a bit more shine payoff. It blends into hair easily, though on dry hair it can feel slightly crunchy if it isn’t worked through thoroughly; a quick brush-through afterward usually solves that. It also travels well, since it can be transferred into a smaller bottle without leaking.

Creams like these work best when applied sparingly and blended evenly; a little product spread thin tends to outperform a larger amount applied all at once.

Best Clean-Beauty Heat Protectants for Fine Hair

If clean beauty is a priority for you, there are a couple of standout options that don’t sacrifice performance for a cleaner ingredient list.

Dae Agave Dry Heat Protection and Hold Styling Mist is genuinely one of the lightest-feeling formulas out there; it holds curls all day while feeling like almost nothing is in your hair, which is exactly what fine hair needs. It has a fruity scent that’s noticeable without being overwhelming, and it adds a visible boost of shine, which makes it a strong pick if styling longevity is your main concern.

Briogeo Colour Me Brilliant Mushroom and Bamboo Colour Protect Primer stands out for protecting against both heat and colour fade at the same time, which is useful if you’re dealing with colour-treated fine hair  including if you’re maintaining neutral blonde tones or trying to make highlights last longer between salon visits. 

The scent leans earthy, and the pump can dispense more product than expected, so it’s worth using a light hand; a little goes further than it seems. Used carefully, it’s a formula that’s 97% naturally derived and vegan, without feeling like a compromise on results.

Clean-beauty formulas like these prove that a shorter ingredient list doesn’t have to mean giving up on lightweight performance for fine hair.

FAQ

Do I really need heat protectant if I have fine hair?

Yes, fine hair isn’t more resistant to heat damage just because it’s thinner. If anything, choosing the right lightweight formula matters more, since heavy products will weigh it down faster than they would thicker hair.

Should I use a spray or a cream for fine hair?

Sprays and mists tend to work better for fine hair since they distribute more evenly without adding bulk. Creams can still work, but they need to be applied sparingly and blended thoroughly to avoid feeling heavy.

When should I apply heat protectant?

On damp hair before blow-drying, and on fully dry hair before using a flat iron or curling iron. Applying it at the wrong stage means you’re not getting even coverage.

What temperature should my heat protectant handle?

Look for one rated up to at least 450°F, which covers most blow dryers, flat irons, and curling irons. Check your tool’s settings to make sure they don’t exceed what your product protects against.

Can heat protectant cause buildup on fine hair?

It can, especially with heavier, non-water-soluble silicones that aren’t fully rinsed out over repeated use. If you notice your hair feeling weighed down over time, a silicone-free option or an occasional clarifying wash can help reset things.

Conclusion

Finding the right heat protectant for fine hair really comes down to weight. A formula that’s too heavy will undo any benefit it’s supposed to provide, no matter how well it performs on paper. Whether you land on a mist, a cream, or a clean-beauty formula, the goal is the same: real protection without the trade-offs of greasy, flat, or weighed-down hair.

Start with one that matches how you already style: spray if you reach for hot tools daily or cream if you prefer working product through by hand, and build your routine from there.

Neutral Blonde Hair: The Complete Guide to Shades, Styling & Upkeep

0

Introduction

This complete guide to neutral blonde hair covers everything from what it actually is to how to keep it looking fresh long after you leave the salon. Neutral blonde sits right in the middle of warm and cool tones – no gold pulling too yellow, no ash going too silver, which is exactly why it works on almost anyone.

I started asking for neutral blonde a few years ago after getting tired of chasing brassiness with warm tones and fighting harsh regrowth lines with cool ones. It’s the one shade that actually feels low-maintenance without looking flat or boring. If you’re trying to figure out whether it’s right for you, what to actually say to your stylist, or how to keep it looking this good at home, this guide walks through all of it.

What Is Neutral Blonde Hair?

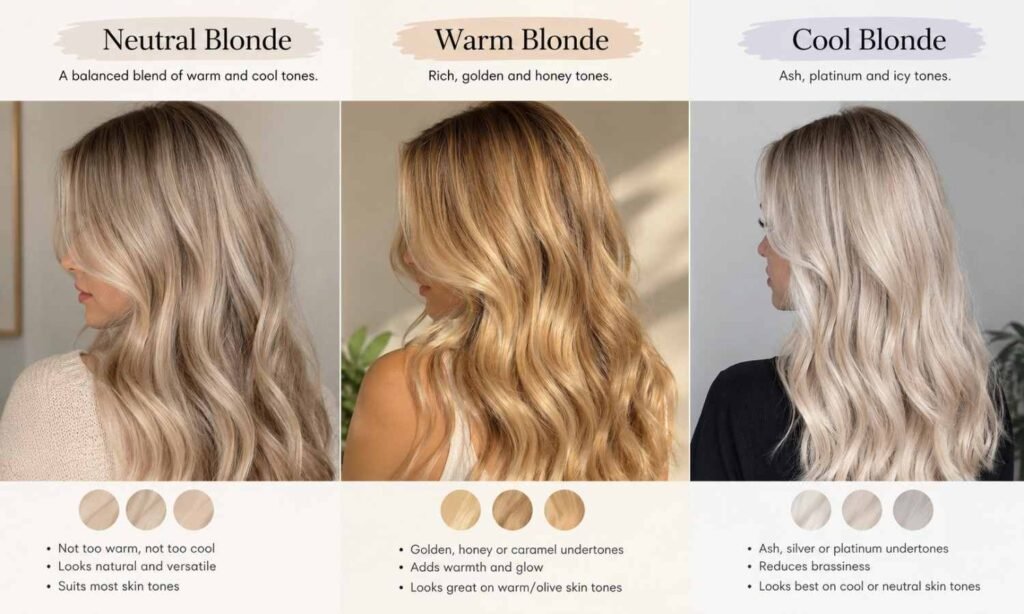
Neutral blonde hair colour sits directly between warm and cool tones; it doesn’t lean gold, honey, or orange, and it doesn’t lean ash, silver, or icy either. Instead, it balances both, which is what gives it that soft, effortless look that doesn’t fight your skin tone.

This balance is also what makes neutral blonde so versatile. Because there’s no strong undertone pulling in one direction, it tends to suit a wider range of skin tones than a heavily warm or heavily cool blonde would. And it’s not limited to one brightness level; you can go neutral at a dark, bronde-adjacent shade or take it all the way up to a soft platinum, and the same “in-between” balance still applies.

That’s really the core of what makes this shade different: it’s not about how light or dark you go; it’s about keeping the undertone neutral no matter where you land on the colour scale.

Neutral vs. Warm vs. Cool Blonde

Once you understand what neutral blonde is, it helps to see how it actually compares to the other two directions blonde can go because the differences aren’t just about looks; they affect how much upkeep you’re signing up for.

Warm blonde leans toward strawberry, honey, or golden tones. It can look gorgeous fresh out of the salon, but without consistent toning in between visits, it tends to drift toward orange or brassy, especially as it grows out. If you go warm, plan on staying on top of your at-home toning routine.

Cool blonde, or ash blonde, sits on the opposite end. It has that smoky, silvery edge, and while it looks striking, it’s actually the highest-maintenance of the three. Since warm tones are naturally occurring in most hair, keeping hair fully ash means constantly cancelling out that warmth, which takes more frequent salon visits and more careful at-home care to maintain.

Neutral blonde is the middle ground, which is exactly why it needs less upkeep than either extreme. That said, you don’t have to pick strictly one lane. If you like a hint of that ash effect without committing to full cool-toned maintenance, you can ask your stylist to add subtle ashy dimension into an otherwise neutral base. You get a touch of that smoky depth without the harsher maintenance schedule that comes with going fully cool.

Is Neutral Blonde Good for Covering Grey Hair?

Yes, neutral blonde works well for covering grey, and it actually has an advantage over more dramatic colour choices: it blends rather than fights.

Instead of covering greys completely and creating an obvious, flat line of regrowth, you can ask your stylist to blend grey strands in with neutral blonde highlights. This adds dimension around the greys rather than hiding them outright, so regrowth looks intentional instead of glaringly obvious between appointments.

If you’d rather have full coverage, that’s an option too it just depends on how you want to approach it. A demi-permanent colour will cover a good portion of grey but fades gradually over time, which some people prefer since it blends back out naturally. A permanent formula goes further, covering grey more completely and holding that coverage until your regrowth comes in. Your stylist can help you decide which route makes more sense based on how much grey you have and how much maintenance you’re up for.

What to Ask Your Stylist For

Getting neutral blonde right starts less with the colour itself and more with how clearly you communicate what you want and a few key things can make that conversation a lot more productive.

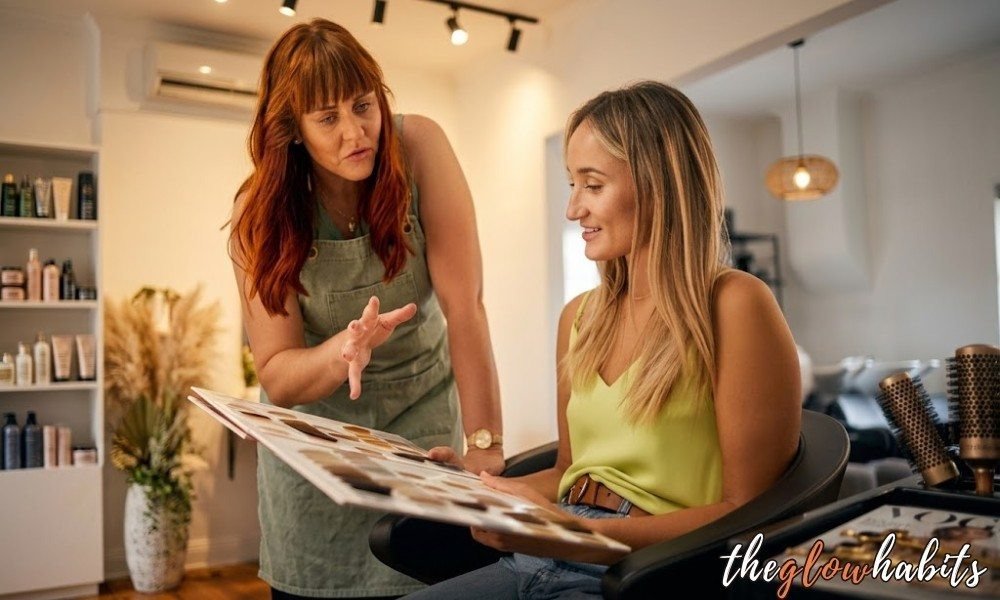
Bring reference photos. Colour is such a visual thing that words alone often get lost in translation. A photo gives your stylist something concrete to work from, and it also opens up a conversation about what’s realistically achievable sometimes in one visit, sometimes over a few, depending on where your hair is starting from.

Talk through your natural tone and how much lift is realistic. Your stylist needs to know your starting point to figure out how much your hair can safely lighten without causing damage. Dermatologists recommend spacing out colour treatments by at least 8 to 10 weeks to limit cumulative damage; this isn’t something to rush. 

Decide on touch-up frequency together. How often you’re willing to come back in shapes which technique makes the most sense for you. This is also the point to bring up balayage versus traditional highlights; they grow out differently, and your stylist can help you pick whichever fits your maintenance schedule better.

Be honest about your budget and how much upkeep you’ll actually do. Neutral tones already give you more flexibility here than a harsher cool-toned blonde would, but your stylist still needs the full picture, including what you’re comfortable spending and how consistent you’ll be with maintenance, to recommend the right approach from the start.

If you’re not sure how to put all of this into words, use this as a starting point: “Low-maintenance, neutral-blonde hair colour with natural dimension and sun-kissed highlights.” It’s a simple phrase, but it tells your stylist exactly what you’re after: a soft, wearable blonde with movement, not a flat, one-note colour.

Neutral Blonde Shade Inspiration

Neutral blonde isn’t one single shade; it’s more of a balance point that can show up in a lot of different looks. Here are a few variations worth bringing to your stylist as a starting point.

Neutral Blonde Highlights

This is the classic version: highlights placed to add brightness and dimension without pulling too warm or too cool. It reads as bright and healthy without looking overly done, which is exactly why it’s such a popular, wearable choice.

Neutral Blonde with Warm Tones

If you want the low-maintenance benefits of neutral but still love a bit of glow, you can ask your stylist to work in subtle golden undertones. It keeps the base balanced while adding just enough warmth to feel radiant rather than flat.

Neutral Platinum Blonde

Platinum is one of the harder shades to get right: go too warm and it loses that crisp, bright quality; go too cool and it can look overly icy or frosted. A neutral approach threads that needle, giving you a platinum that still feels balanced instead of harsh.

Neutral Blonde Balayage

Balayage is naturally suited to a neutral finish since the hand-painted technique already creates a soft, blended look. Paired with a neutral tone, you get that sun-kissed, lived-in effect without any strong warm or cool cast pulling through.

Neutral Blonde Ombré

For anyone easing into blonde from a darker base, a neutral ombre is a gentler way in. Keeping your natural root in place and graduating into a neutral blonde toward the ends keeps maintenance low while still giving you a noticeable, brightening change.

Neutral Brown-Blonde (Bronde)

Bronde sits right between brown and blonde, and going neutral with it makes the shade even more versatile; it’s soft enough to wear year-round without feeling like it’s locked into one season or vibe.

Dark Neutral Blonde

This version keeps things rich and dimensional rather than icy or overly bright. It’s a good option if you want the neutral balance without going particularly light or dark roots or lowlights combined with neutral mid-tones create depth without any harsh warm or cool pull.

Best Products for Neutral Blonde Hair

Even with a balanced tone, blonde hair is still colour-treated hair, which means the products you use matter just as much as the color itself when it comes to keeping it healthy and looking fresh.

Shampoo

I look for a gentle, sulphate-free shampoo as the foundation of any colour-treated routine, one that cleanses without stripping natural oils or fading tone with every wash. If your hair leans warm between salon visits, it’s also worth having a toning shampoo in rotation, ideally one with a thinner, easy-to-rinse formula so it doesn’t stain your hands or leave residue in the shower. And once every week or two, a detox or clarifying shampoo helps remove product buildup; just make sure it’s a gentle one, since harsh clarifying formulas can be just as drying as skipping conditioner altogether.

Conditioner

A good hydrating conditioner should feel lightweight rather than heavy, adding shine and strength without weighing hair down. For neutral blonde specifically, a toning conditioner is worth having on hand as a gentler alternative to a toning shampoo; it neutralises warmth gradually without the risk of over-toning or leaving a tint behind, which makes it easier to control than a stronger toning shampoo.

Treatments, Oils & Masks

This is where the real maintenance happens. A weekly hair mask helps replace moisture that colour treatments strip away, and a good one shouldn’t leave hair feeling weighed down or greasy. I rounded up my favourite lightweight masks for damaged, colour-treated hair here if you need a starting point. A heat protectant is non-negotiable for colour-treated hair; look for one that doubles as a leave-in or detangler, so you’re getting more use out of a single product. For extra shine between salon visits, a gloss treatment is worth the investment; it won’t tone hair the way a purple shampoo does, but it makes colour look noticeably richer and healthier. And a lightweight hair oil, applied to damp hair before it dries, adds hydration and tames frizz without leaving hair feeling greasy; just avoid using too much, since oil can flatten fine hair if you’re not careful with the amount.

How to Maintain Neutral Blonde at Home

Great colour from the salon only stays great if your at-home routine supports it and the good news is neutral blonde doesn’t require a complicated system to stay looking fresh.

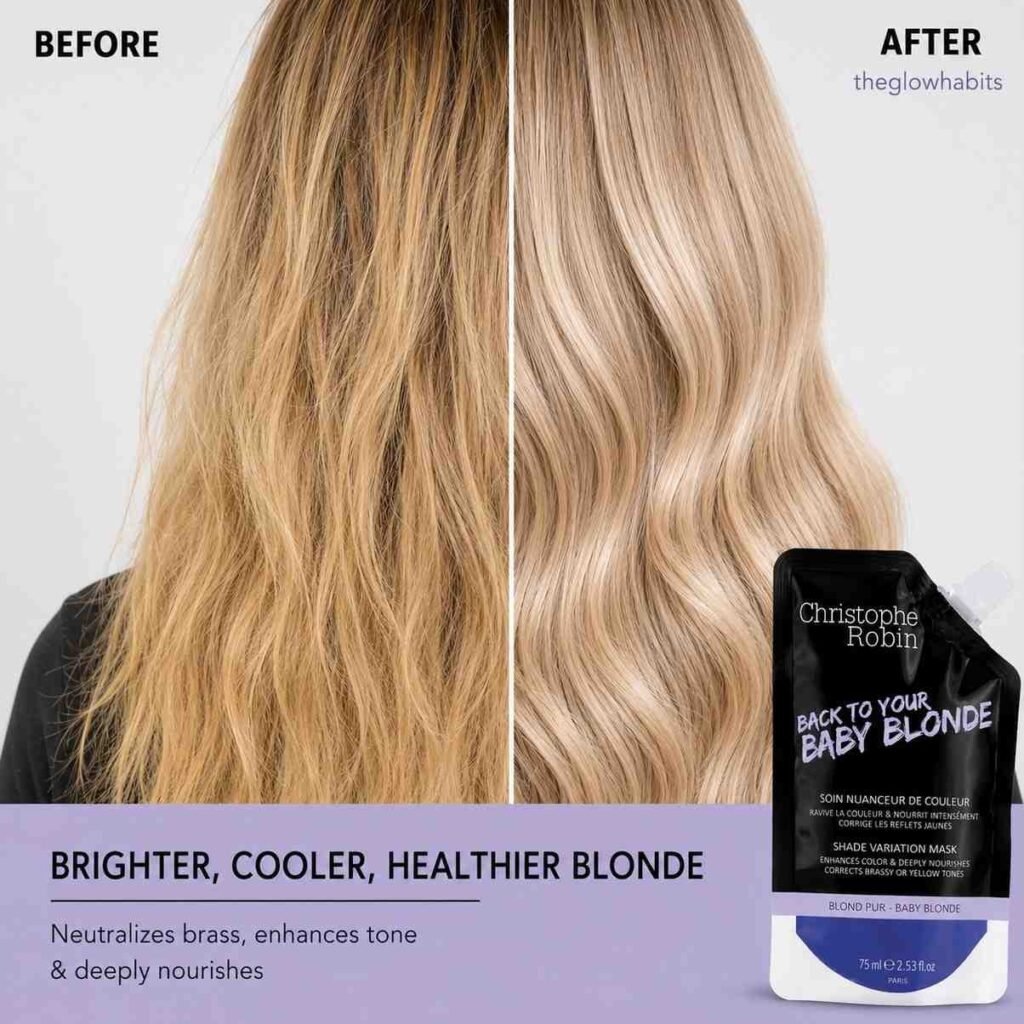
Tone as needed, not on a rigid schedule. If you notice warmth creeping in, that’s your cue to reach for a purple shampoo or mask rather than waiting for a set day of the week. Here’s my full breakdown of blue vs purple shampoo if you’re not sure which one your tone actually needs.  Leave it on for a shorter time than you would for a fully cool-toned blonde; you’re just softening warmth, not eliminating it, so a lighter touch keeps you from accidentally overcorrecting into ashy territory. If shampoo formulas tend to over-tone or stain for you, a toning conditioner works just as well and is easier to control.

Protect your hair before you reach for hot tools. Heat is one of the fastest ways neutral blonde starts leaning warm, so a heat protectant should go on before every blowout or styling session. Dermatologists also recommend protecting coloured hair from sun exposure with a leave-in conditioner or a wide-brimmed hat, since UV exposure fades tone just as much as heat does. 

Reach for shine, not just tone correction. Toning keeps colour balanced, but it doesn’t necessarily make hair look glossy. That’s where a lightweight hair oil or gloss treatment comes in; either one adds visible shine and makes colour look richer, without the risk of shifting your tone. I tested one of my go-to in-shower gloss treatments here if you want a specific pick to try. The way an extra round of toner might. This is especially useful in between salon visits when your colour still looks fine but could use a little extra life.

Together, these three habits – toning when needed, protecting before heat, and finishing with shine – are usually enough to keep neutral blonde looking as balanced at home as it did the day you left the salon.

FAQ

How is neutral blonde different from ash or warm blonde?

Neutral blonde has no strong undertone; it doesn’t pull gold like warm blonde or silver like ash. That balance is what makes it lower-maintenance than either extreme.

Can neutral blonde cover grey hair?

Yes. It blends greys in with highlights for a soft, dimensional look, or you can go with demi-permanent or permanent colour for fuller coverage, depending on how much upkeep you want.

Do I need purple shampoo for neutral blonde?

Only as needed, not on a strict schedule. Use it when you notice warmth creeping in, and leave it on for less time than you would for a fully cool-toned blonde.

What should I ask my stylist for if I want neutral blonde hair?

Bring reference photos, discuss your natural tone and touch-up frequency, and try this phrase as a starting point: “Low-maintenance, neutral-blonde hair colour with natural dimension and sun-kissed highlights.”

Is neutral blonde high-maintenance?

No, it’s actually one of the easier blondes to maintain since there’s no strong undertone constantly fighting to show through as your hair grows out.

Conclusion

Neutral blonde works because it doesn’t ask you to commit to one extreme; it’s not fighting brassiness every few weeks or chasing an icy tone that fades fast. A little clarity with your stylist, a light touch with toning at home, and a few good habits in between visits are usually all it takes to keep it looking balanced.

If you’ve been going back and forth between warm and cool without finding the right fit, this complete guide to neutral blonde hair should give you everything you need to finally land somewhere that actually works for you.

How to Make Highlights Last Longer Without Constant Salon Visits

1

No matter what shade you go for, highlights never stay this bright on their own. The moment you leave the salon, the clock starts ticking, brassiness creeps in, and the shine fades, and before you know it, you’re due for another appointment sooner than you’d like.

I used to think this was just the price of getting highlights done, until I actually figured out what was causing the fade and fixed it. Turns out, most of it comes down to a handful of small habits, not constant salon visits.

Here’s exactly what keeps highlights looking fresh, from what to ask your stylist for to the simple things you can do at home in between.

Highlights Maintenance: Quick Facts

CategoryDetails
Best ForBabylights, Balayage & Traditional Highlights – All Hair Colours
Why It FadesFrequent washing, hot water, heat styling, hard water
At-Home TonerBlue (brunette) · Purple (blonde)
Touch-Up FrequencyEvery 6–12 weeks
Quick Fix OptionFace-framing foils – no full redo needed
Daily ProtectionHeat protectant + SPF

Why Highlights Fade So Fast

Highlights don’t just fade randomly; there’s a real reason your colour loses its glow so quickly, and it comes down to three things.

First, how often you wash your hair matters more than you’d think.
Every wash releases a bit of the toner sitting on your strands, so the more frequently you shampoo, the faster that toner disappears, which is exactly when warmth and brassiness start creeping back in.

Heat styling doesn’t help either. Flat irons, curling wands, and blow dryers used often can pull toner right out of your hair, dulling your highlights faster than you’d expect. If you’re someone who styles daily, this is probably working against you more than you realise.

Then there’s the lightening process itself. Getting highlights means stripping some of your hair’s natural pigment, and that process can also weaken the hair, leaving it drier, more fragile, and prone to breakage if it’s not cared for properly afterward.

That’s why healthy, vibrant highlights aren’t just about tone; they’re about keeping the hair strong enough to hold that tone in the first place. Once you understand what’s actually causing the fade, it’s a lot easier to build a routine that actually works against it.

What to Ask Your Stylist For

The biggest difference between highlights that fade fast and highlights that hold up for months usually comes down to what you ask for at the appointment, not just the colour itself.

Start with “lived-in colour”. This phrase alone changes how your stylist approaches the whole service. Instead of placing highlights in a rigid pattern, they’ll blend everything so your regrowth looks intentional instead of obvious.

It’s worth bringing reference photos but also telling your stylist upfront how often you actually want to come back in, as that shapes the placement and technique they choose for you.

Ask about babylights instead of traditional highlights. Babylights are much finer than the chunkier streaks you’d get with classic highlights, which means two things: they look more natural, and they grow out far more gracefully. Since the sections are so thin, there’s no harsh line where new growth starts, just a soft, gradual fade.

Bring up a root smudge or a root melt. These aren’t the same technique, but they solve the same problem: that stripe of demarcation where your natural colour meets your highlights. A root smudge blends a soft shadow at the base, while a root melt gradually transitions the colour down the length of your hair. 

Either way, your stylist will pick whichever suits your hair better, and the result is highlights that look seamless from day one, with noticeably less obvious regrowth as weeks go by.

Asking for these three things specifically can add real time between salon visits, simply because the color is designed to grow out well instead of looking off the moment new hair comes in.

Low-Maintenance Salon Techniques

Beyond what you ask for, there’s a bigger-picture approach that keeps highlights low-maintenance over time and it starts with consistency.

Stick to the same foil pattern every time you go in. It’s tempting to add more highlights or change up the placement at every appointment, but constantly lifting new sections of hair means you’re repeatedly exposing fresh strands to bleach.

That adds up in damage over time. Sticking with the same foil pattern means your stylist is only touching up what’s already there, healthier hair, and a routine that’s easier to maintain long-term.

Shadow rooting works hand-in-hand with this. It’s a blending technique where your natural colour is softly deepened right at the root, so there’s no obvious line between your base colour and your highlights. Combined with the root smudge or melt from your stylist conversation, 

this is what actually makes highlights look low-maintenance instead of high-upkeep; the grow-out looks intentional rather than like something that needs fixing. Together, these two things shift highlights from a service you have to keep redoing to one you can simply refresh.

A Quick Highlight Refresh, Step by Step

Not every touch-up needs to be a full head of foils. If your highlights just need brightening around the face rather than an entire redo, there’s a faster technique worth knowing about and it’s exactly what professional colourists use for a quick refresh.

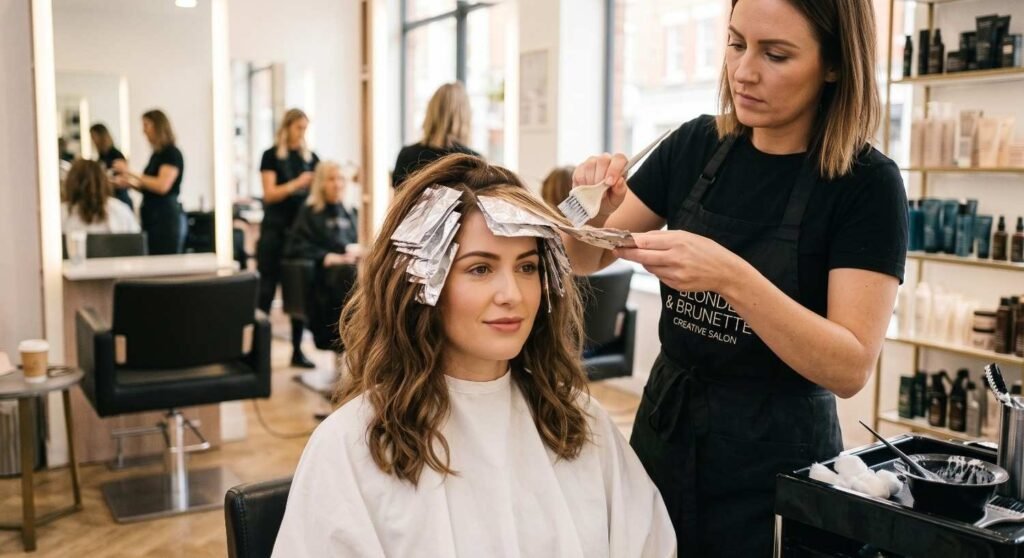
It starts with a face-framing foil placement of just 15 to 20 foils, not a full head. This targets the pieces that frame your face, which are usually the first to lose their brightness since they’re the most visible and get the most sun exposure. It’s a fraction of the time and cost of a full highlight service, but it makes a noticeably bold difference.

The application uses a babylight technique, a very fine weave, placed back-to-back with little to no hair left between sections. This is what gives the finished look its softness. Placing foils close together like this creates a diffused, blended result rather than distinct stripes, so the colour looks natural even as it grows out.

On darker hair, expect the processing time to run around 40 minutes. Darker hair needs more time for the lightener to lift properly, so this isn’t a service you can rush, but compared to a full head of highlights, it’s still a much shorter salon visit.

Once the foils are removed, toning happens right at the shampoo bowl. Rather than a single flat tone, colourists often use a gradient approach, melting one tone from the roots into the mid-lengths, then shifting to a slightly different tone through the ends. 

This creates more dimension than a single all-over toner would, and because professional toners are formulated to process quickly, the whole step only takes a few minutes before your colour is rinsed and finished.

The result is a refreshed, brightened look without committing to a full colour service, ideal if you just need your highlights to look “new” again without redoing all the work you already have.

At-Home Wash Routine That Protects Toner

Everything you ask for at the salon can only last so long if your wash routine works against it. The good news is that protecting your toner at home comes down to a few simple habits, not a complicated routine.

Wash in cool or lukewarm water, never hot. Hot water opens the hair cuticle and speeds up how quickly toner rinses out, which is exactly what you’re trying to avoid. Lukewarm water gets your hair just as clean without stripping colour as fast. You don’t need it ice-cold, just not scalding.

Pay attention to how often you’re washing, not just how. Every wash releases a little more toner, so the more frequently you shampoo, the quicker your highlights will start showing warmth again. Stretching out the days between washes even by a little makes a real difference in how long your colour stays true.

Switch to a colour-specific shampoo and conditioner. Regular formulas aren’t built to protect toner, and many contain sulphates that strip colour faster with every wash. Colour-safe versions are gentler on treated hair and help hold onto the tone you just paid for.

Add a colour-depositing mask into your routine once a week. This does double duty: it deposits a bit of pigment to refresh your tone between salon visits while also giving your hair the hydration it needs after the lightening process. It’s one of the easiest ways to stretch time between toning appointments without much extra effort.

None of this requires a complicated routine, just swapping a few habits that, over time, make a noticeable difference in how long your highlights stay bright.

Toning Highlights at Home

Salon toner doesn’t last forever, but you don’t need a professional to keep brassiness in check between visits. The right at-home products can extend that fresh-from-the-salon look for weeks.

Blue Toner for Brown/Brunette Highlights

If your highlights sit on brown or brunette hair, blue is the tone you want, not purple. Brunette highlights tend to pull orange as they fade, and blue is what cancels that out. A toning conditioner with a hint of blue works well here because it’s hydrating while it tones, so you’re not sacrificing moisture to fight brassiness. A blue shampoo can work too, though conditioner-based formulas tend to be gentler and often last a little longer between uses.

Purple Shampoo for Blonde Highlights

Blonde highlights fade differently; they pull yellow, not orange, which is why purple shampoo is the go-to here instead of blue. Using it every two to three weeks is usually enough to keep blonde highlights looking bright and cool-toned rather than brassy. Any more frequently than that, and you risk overcorrecting; any less, and yellow tones can start creeping back in before your next wash.

Toning Mousse Option

If shampoo or conditioner formulas feel like too much commitment, a toning mousse is worth trying. It’s a leave-in option, so you skip the rinse-out step entirely; just work it through damp hair and let it do its job. This tends to work well for anyone who wants to tone without adding another full product to an already long shower routine.

Hair Gloss for Extra Shine

It’s easy to assume brassy-looking highlights just need more toner, but that’s not always the fix. Toner cancels out unwanted warmth; it doesn’t necessarily make colour look brighter or shinier. That’s where a gloss comes in. 

Instead of correcting tone, a gloss adds shine and vibrancy on top of it, which is often what highlights actually need to look “fresh” again rather than just “not brassy”. Using both toner to correct and gloss to brighten tends to give the most noticeable result.

Repairing Damage From Lightening

Highlights don’t just fade in colour; the hair itself takes a hit in the process, and that’s just as important to address as tone.

Lightening strips away more than pigment. Whenever hair is bleached, it loses some of its natural protein and lipids, along with the colour it sheds. This is what causes highlighted hair to feel drier, frizzier, and more prone to breakage than hair that’s never been colour-treated, even if the tone itself still looks fine.

That’s why protein and lipid replenishment matters just as much as toning. Products designed to rebuild what bleaching removes help hair hold onto its strength and softness, rather than just looking bright on the surface while weakening underneath. 

Skipping this step is often why highlighted hair can look good for a while, then suddenly start snapping or feeling straw-like out of nowhere.

Think of this as a separate step from toning, not a replacement for it. Toner fixes colour; protein and lipid treatments fix the hair’s actual condition. Highlights that last and look genuinely healthy, not just bright. They need both working together, not one or the other.

Protecting Highlights From Heat & Sun

Heat and sun exposure are two of the fastest ways to dull highlights, even when your wash routine and toning are on point. Protecting against both makes a bigger difference than most people expect.

Heat Protectant

Skipping heat protectant is one of the easiest ways to quietly dull your highlights over time. The difference is more noticeable than you’d think; hair styled without protection tends to look flatter and less vibrant, even if the colour itself hasn’t technically faded. 

A clean-beauty formula is worth looking for here, since heavier products can leave a residue or film that weighs hair down instead of just shielding it. The goal is something that protects without you feeling like there’s product sitting in your hair.

No-Heat Styling Alternatives

Skipping hot tools altogether, even occasionally, gives highlights a break they don’t usually get. One simple option: braid damp hair before bed and let it set overnight instead of blow-drying or curling it the next morning. 

In the morning, smoothing a bit of oil through the braided waves helps tame any frizz and adds shine; no heat is required. It’s a small swap, but doing it even a couple of times a week reduces how much thermal stress your highlights are exposed to.

Sun Protection for Color-Treated Hair

Sun exposure fades colour just like it fades fabric, and highlighted hair is especially vulnerable since it’s already been lightened once. A hat is the simplest fix if you’re outside for long stretches, but for daily protection

A powder SPF made for hair applied at the roots is worth adding to the routine. It’s lightweight, doesn’t clump or leave residue, and protects colour without interfering with how your highlights look or feel.

Hard Water and Highlight Fade

You can do everything right – the toner, the protectant, and the colour-safe products – and still watch your highlights fade faster than expected. If that’s happening, the culprit might not be your routine at all. It might be your water.

Hard water works against your colour no matter how careful you are. It’s easy to overlook, but the minerals in hard water build up on hair over time and can fade colour, dry out strands, and even contribute to breakage, undoing all the effort you’re putting in elsewhere. 

The frustrating part is that none of your usual fixes (better shampoo, more toner) actually solve this, because the problem starts before the product even touches your hair.

The first step is figuring out if hard water is actually the issue. Simple test kits are widely available and make this easy to check at home – no guesswork needed. If the test confirms hard water, installing a filter is worth the investment. It’s a one-time fix rather than an ongoing workaround, and the difference in how your colour holds up afterward tends to be noticeable.

If your highlights are fading faster than they should despite doing everything else right, this is the one thing worth ruling out before assuming the product or technique is to blame.

Highlight Maintenance by Hair Colour

Not all highlights fade the same way, and maintenance really does shift depending on your base colour. Here’s what tends to work best for each.

Brown/Brunette Hair

Brunette highlights typically need a salon visit every two to three months to keep them looking fresh, since darker bases show grow-out and warmth faster than lighter ones. Between visits, a toning mousse is worth keeping in rotation

It’s an easy way to knock back brassiness without committing to a full shampoo swap. Leaning on no-heat styling as often as possible also helps stretch the time between appointments, since heat is one of the fastest ways brunette highlights lose their shine.

Blonde Hair

Blonde is the most prone to brassiness out of any highlight colour, which is why purple shampoo earns a spot in the routine every two to three weeks. Masking regularly matters just as much here

Blonde hair tends to feel the effects of lightening more than other shades, so keeping it hydrated and strong is part of maintaining the colour, not separate from it. One trick worth knowing: a coloured, lightly tinted dry shampoo can help ash out the roots between washes, keeping regrowth from looking too warm or golden.

Red Hair

Red highlights fade the fastest of any colour, so it’s worth going in slightly darker and richer than your target shade from the start. It gives the colour more room to fade gracefully instead of looking washed out too quickly. 

If you have dyed red hair and are adding highlights on top, make sure your stylist keeps the highlighted sections separated from the red dye during application. Without that separation, the colours can bleed into each other and muddy the result.

Black Hair

Black hair exposes the most warmth when it’s lightened, which makes toning between highlight appointments especially important; skipping it lets brassiness show up faster and more visibly than on lighter bases. 

Heat protectant also matters more here than people expect; between the wash routine, styling habits, and sun exposure, black hair with highlights can fade quicker than it looks like it should, so protecting it from heat is one of the simplest ways to slow that down.

Maintaining Highlights While Traveling

If you travel often, your highlight routine needs to travel with you and that’s usually where things fall apart. Liquids get left behind for TSA rules, or your usual products just don’t make it into a carry-on, and your at-home routine quietly stops happening for weeks at a time.

This is worth bringing up with your stylist, not just figuring out on your own. A busy travel schedule changes what kind of maintenance actually works for you, and it’s a good opportunity to ask whether your current at-home routine still fits your lifestyle or if it needs to change.

A powder-to-liquid shampoo and conditioner system solves the biggest travel problem: bulk and spill risk. Instead of packing bottles, you’re carrying a small, lightweight container of powder. Wet your hands in the shower, add a small amount of powder, and mix in a bit more water, and it transforms into a lather just like a regular shampoo or conditioner. 

No liquid restrictions to worry about, no risk of a bottle leaking through your bag, and one small container lasts through dozens of washes, which means you’re not repurchasing travel-size products every time you fly.

This kind of system isn’t just for frequent flyers. It works just as well for anyone who’s active outdoors on camping trips or at festivals or in the gym bag you keep packed anywhere a full bottle isn’t practical but you still need to protect your colour.

If your highlights tend to look worse after a trip than before it, the issue usually isn’t the travel itself; it’s that your routine didn’t come with you. Fixing that is a lot simpler than it sounds.

A Styling Routine That Keeps Color Looking Fresh

How you style your hair day to day plays a bigger role in how long highlights look good than most people realise and the right routine doesn’t have to be complicated.

Start at the roots with a volumising mousse. Massaging a small amount into the root area adds fullness and body without weighing hair down, and it gives you something to work with even as highlights grow out. Fuller-looking roots also make regrowth less obvious, which stretches how long your hair looks freshly done between salon visits.

Use a thermal-protecting spray through the mid-lengths and ends before blow-drying. This does double duty; it shields hair from heat damage while also helping your style hold longer, so you’re not reaching for hot tools again the next day just to fix flat, lifeless ends. Protecting this way means your highlights keep their vibrancy instead of slowly dulling every time you blow-dry.

Finish with a dry oil mist once your style is done. This is the step that pulls everything together; it adds softness and a noticeable shine without making hair feel heavy or greasy. 

It’s also what makes highlights actually catch the light instead of just looking flat and one-dimensional, even after all the toning and protecting you’ve already done.

Layered volume at the roots, protection through the length and shine at the end – this routine does more than just style your hair. It’s actively working to keep your highlights looking as fresh as the day you left the salon.

How to Choose the Right Stylist for Your Highlights

Every tip in this guide works better when you’re working with the right stylist to begin with and that comes down to more than just their portfolio.

A good stylist looks at your hair and your lifestyle before recommending anything. Highlight maintenance isn’t one-size-fits-all; how often you wash your hair, how much heat styling you do, how busy your schedule is, and even how often you travel all shape what kind of highlights will actually work for you long-term. 

A stylist who asks about these things before picking a technique is setting you up for colour that’s realistic to maintain, not just colour that looks good walking out the door.

Communication matters more than people expect. Bring reference photos, but don’t stop there; be upfront about how often you’re actually willing to come in for touch-ups and what your day-to-day routine looks like. 

The clearer you are about your lifestyle and expectations, the better your stylist can customise both the technique and the products they recommend, instead of giving you a generic recommendation that doesn’t fit how you actually live.

Getting this right at the start saves you from a colour that fights your lifestyle every step of the way and makes everything else in this guide easier to actually stick to.

FAQ‘s

How often should I get my highlights toned?

Every 4-6 weeks on average. Blonde highlights need it closer to every 2–3 weeks since brassiness shows up faster.

Can I tone my highlights at home safely?

Yes, blue for brunettes and purple for blondes. Just don’t leave it on longer than the instructions say, or hair can look dull or overly cool-toned.

Does hard water really fade hair colour?

Yes. Mineral buildup fades colour and dries out strands, no matter how good your product routine is. Worth testing your water if highlights fade faster than expected.

What’s the difference between a gloss and a toner?

Toner cancels out brassiness. Gloss adds shine and vibrancy. Using both together gives the best result.

Are babylights lower maintenance than traditional highlights?

Generally yes. The grow-out is softer and less obvious, so salon visits can be spaced further apart, though you’ll still need to tone and protect at home.

Conclusion

Highlights that last aren’t about one magic product they’re about small habits working together: what you ask your stylist for, how you wash and tone at home, and protecting your hair from heat, sun, and hard water. Start small. Switch to a color-safe shampoo, or finally use that heat protectant you’ve been skipping, and build from there. Your highlights will hold their shine, and you’ll spend a lot less time and money chasing brassiness out of your hair.

Best Leave-in Conditioners for Fine, Straight Hair in 2026

2

Fine, straight hair is surprisingly picky; it needs moisture but turns limp and sticky within hours if you reach for the wrong formula. I’ve gone through countless bottles before figuring out what actually works, and it always traces back to one thing: the right leave-in conditioner.

Getting bored with your products mid-week is usually a sign of a mismatch, not a product failure. A solid leave-in conditioner should keep hair genuinely hydrated, not just superficially soft from wash day to the last day before you wash it out again.

One of the biggest mistakes I still see is treating leave-ins like a rinse-off treatment. Unlike regular conditioners, leave-in conditioners stay on your strands to reduce frizz, protect hair from damage, and do it all without leaving a waxy film or making your ends feel crunchy by afternoon.

Think of a good leave-in conditioner as a quiet, essential act of self-care, not just a step in your haircare routine, but a real commitment to healthier hair over time. Using one at least twice a week is the difference between a reactive fix and a genuinely proactive routine.

Before heat styling, it’s also how you properly prep your strands, building a protective layer that keeps fine hair from snapping under high temperatures. The best leave-in conditioners of 2026 prove you don’t have to sacrifice great scents or a reasonable price for results that are actually worth it.

Best Leave-In Conditioners for Fine, Straight Hair (2026)

DAE Mirage Mist Leave-In Conditioner

  • Best For: Clean beauty lovers and everyday frizz control
  • Pros: Incredible citrus scent, lightweight gradual hydration, improved spray nozzle
  • Cons: Was briefly discontinued (but thankfully it’s back!)

The first thing you notice about DAE‘s Mirage Mist is the citrus scent; it’s fresh and uplifting without being overpowering. It’s the kind of smell that actually makes you look forward to your wash routine instead of rushing through it.

Unlike most in-shower conditioners that rinse away before fully absorbing, this mist stays behind and gets to work adding hydration directly where fine hair needs it most. The result is genuinely silky smooth strands, not the hollow softness that fades before you’ve even left the bathroom.

Reducing frizz is where this product quietly earns its place in your routine. Even on humid summer mornings, the DAE Mirage Mist kept my hair controlled and manageable well into the afternoon, something most lightweight sprays simply can’t promise.

Earlier batches did come with some spray issues, which honestly put a lot of people off. But the improved version sorts that out completely, delivering an even mist that spreads across hair without clumping or uneven patches.

It also avoids the common problem of formulas that dry out fine strands over time. This leave-in conditioner layers hydration gradually, giving your hair that signature healthy look without weighing a single strand down.

The product was briefly discontinued, which genuinely worried a lot of loyal users, myself included. At its current price, the comeback is absolutely worth it, especially for anyone who already knows how well it works against everyday frizz.

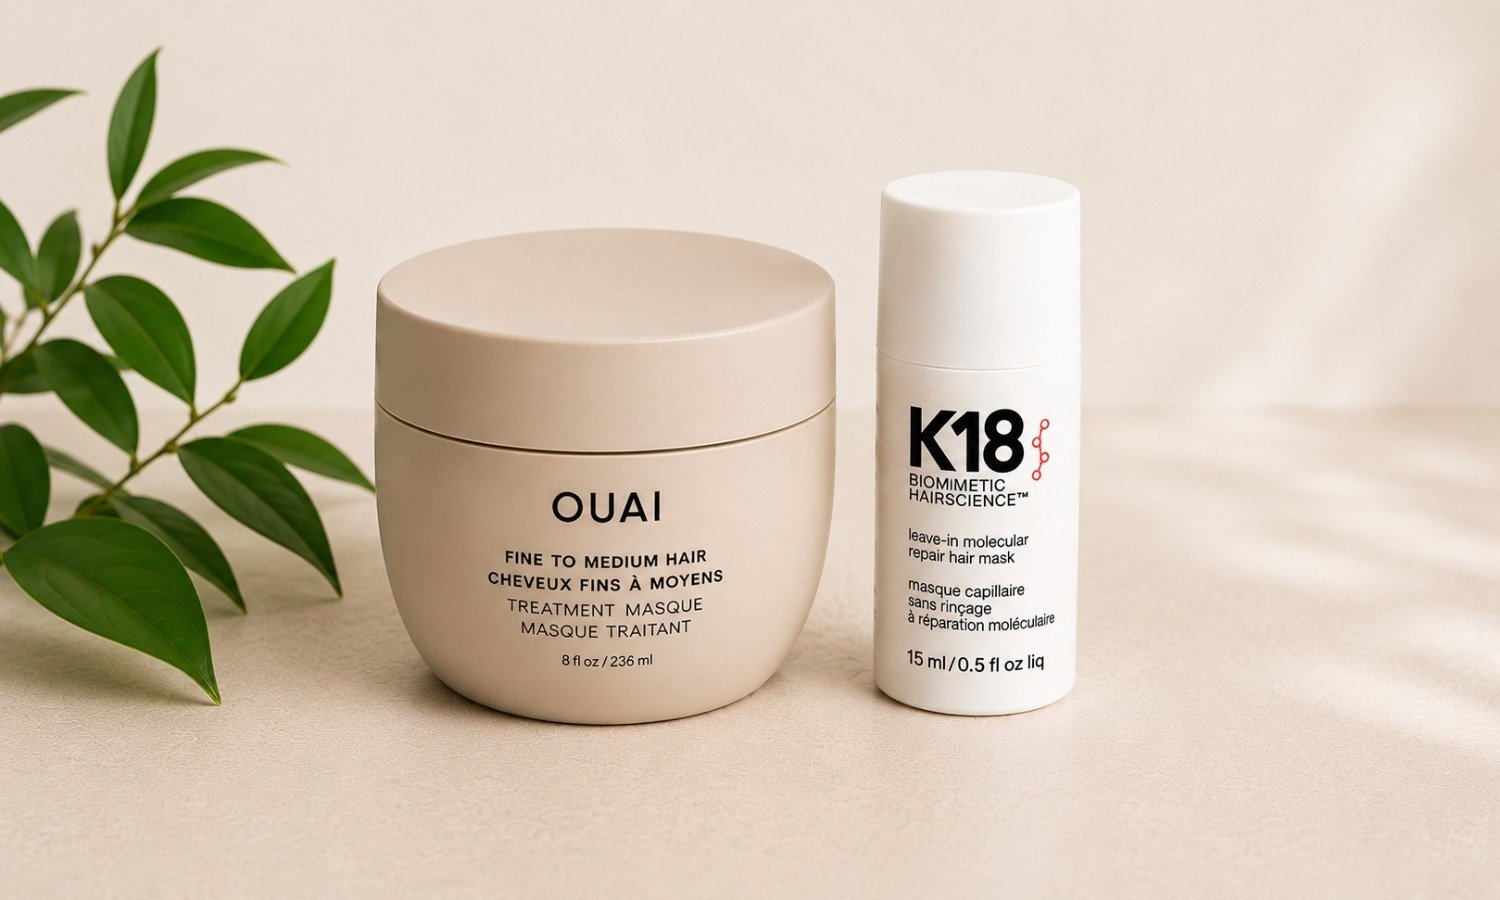
k18 leave-in molecular hair mask

  • Best For: Deep damage repair and treating split ends
  • Pros: Repairs hair from the inside out, creates a lasting protective shield
  • Cons: Higher price point

When it comes to fine, straight hair, finding the perfect balance of moisture without heaviness is tough. Using hot tools a couple of times a week often makes things much worse. After testing countless options in my daily routine, I finally discovered a standout solution.

The K18 leave-in product may seem a bit expensive, but it is a true miracle worker for dry strands. It actively targets breakage while successfully repairing split ends from the inside out.

Simply skip your normal conditioner after your shampoo routine in the morning. Just apply a tiny amount to damp strands, because a little goes a very long way with this potent formula. Let it soak in fully for four minutes before you begin brushing.

It creates a lasting shield, preventing damage with regular use throughout your busy day. I often make it a special weekend self-care treat to really let the formula work its magic. The results are beautifully clear, leaving your fine strands visibly stronger without feeling weighed down. You will immediately enjoy a shinier and noticeably softer finish that truly lasts.

crown affair leave-in conditioner cream for hydrated hair

  • Best For: A luxurious daily styling experience and air-drying
  • Pros: Doubles as a heat protectant, softens instantly without crunch
  • Cons: Expensive ($48), strong fragrance might not suit sensitive scalps

While the K18 mask works wonders for deep repair, this luxurious leave-in cream offers daily style perfection for fine hair. It feels high-end and elevates your entire morning routine. At 48 dollars, it might seem expensive, but it doubles as an effective heat protectant. A tiny dab reduces stubborn frizz instantly and gives a sleek, polished look.

When I apply it to damp strands, my fine hair softens instantly without ever feeling heavy or crunchy. You can also let your hair air dry for a soft, natural wave. The scent is quite noticeable, acting almost like a fine perfume with its rich fragrance. If your scalp is sensitive to scents, you might prefer unscented formulas or products like Unite.

unite hair 7SECONDS detangler leave-in conditioner

  • Best For: Daily detangling, travel, and beach days
  • Pros: Extremely lightweight, fantastic at tackling harsh water and severe tangles
  • Cons: Packaging is a bit basic for the price

If you need a reliable daily hair solution, this lightweight formula fits seamlessly into any morning routine. It acts as a super hydrating leave-in conditioner that never weighs down fine, limp strands.

I always pack this versatile product when I travel because harsh hotel water often causes severe dryness. Spritzing it on damp hair instantly helps reduce stubborn frizz and smooths out tough tangles.

Whether I am spending a windy afternoon at the beach or blow-drying at home, it effectively prevents long-term damage. It serves as an essential pre-styling heat protectant to shield delicate hair every single day.

Davines oi all in one milk

  • Best For: Intensive weekend treatments
  • Pros: Beautiful earthy scent, incredibly smoothing
  • Cons: Can make hair feel crunchy if you apply too much

When exploring Davines products for straight, fine textures, this rich hair milk truly stands out. It acts as an intensive leave-in conditioner that effortlessly smooths out frizzy strands. I personally find it works much better than their standard O.I. oil, which often struggles to fully absorb. A tiny spray gives you incredibly softer hair without feeling overly heavy or greasy.

However, you must be careful not to apply too much, or your strands might feel a bit crunchy. Since it functions almost like a deep conditioning mask, I prefer using it as a special weekend treatment. The unique, earthy scent lingers beautifully while you blow-dry and style your locks.

Moroccanoil All-in-One Leave-In Conditioner

  • Best For: Weightless hydration and natural shine
  • Pros: Drastically lighter than their serums, reduces split ends
  • Cons: The spray nozzle can be tricky to use evenly

Finding a conditioner that provides deep hydration without weighing down straight strands is a constant challenge. I have always struggled with thick oils making my roots look greasy halfway through the day.

This Moroccanoil spray is drastically lighter than their traditional serums, making it incredibly fine-hair-friendly. It easily manages to hydrate my lengths while feeling completely weightless. I apply it immediately after washing to lock in vital moisture before I even grab a comb. It quickly reduces annoying frizz and adds a brilliant, healthy shine to my natural texture.

Since making this leave-in a staple in my routine, I notice far fewer split ends. It even protects my hair from heat tools when I decide to switch up my daily look. Because the spray nozzle can sometimes be a bit tricky to apply evenly, I prefer keeping the bottle at home rather than packing it for travel.

FAQ‘s

What is the best leave-in conditioner for dry, frizzy hair?

Choose rich, cream-based formulas with hydrating ingredients like shea butter or argan oil to lock out humidity.

Will leave-in conditioner weigh down fine or thin hair?

Heavy creams will, so stick to lightweight, water-based sprays and apply them only from the mid-lengths to the ends.

Do you need a leave-in conditioner for straight hair?

Yes, a lightweight spray helps detangle, reduce static, add shine, and protect against heat styling.

What should I look for in a leave-in conditioner for damaged hair?

Look for reparative ingredients like keratin, silk amino acids, or bond-building technology to patch up broken protein structures.

How do I choose a leave-in conditioner for fine, wavy hair?

Opt for a lightweight hair milk or mist to define your waves and tame frizz without pulling your hair flat.

Conclusion

Finding the perfect leave-in conditioner for fine, straight hair is all about choosing lightweight hydration over heavy creams. Whether you need deep repair, daily detangling, or simple frizz control, the secret to success remains the same: less is more, and always focus your application strictly from the mid-lengths to the ends. By making a quality leave-in an essential step in your routine, you can finally enjoy stronger, shinier, and perfectly protected hair without sacrificing your natural volume!

Blue vs Purple Shampoo for Blonde Hair: What’s the Difference?

1

Ask anyone who colours their hair regularly and you’ll hear the same question over and over: blue or purple? After years of working with colour-treated hair, I can tell you that grabbing the wrong one doesn’t just fail to help; it can genuinely undo weeks of toning work.

The difference between blue and purple shampoo comes down to more than just which bottle looks prettier on your shelf. Your hair type, how brassy your colour has turned, and what tone you’re actually trying to fix all determine which one belongs in your shower.

Here’s the short version: both are toning shampoos, but they neutralise opposite problems. Purple cancels yellow. Blue cancels orange and red. Get that backwards and you’ll spend weeks wondering why your toner “isn’t working”.

Quick answer:
If your hair (typically blonde, highlighted, or grey) is turning yellow, reach for purple. If your hair (typically brunette or dark and colour-treated) is turning orange or red, reach for blue.

Quick Comparison

FeaturesPurple ShampooBlue Shampoo
CancelsYellow tonesOrange and red tones
Best for
Blonde, platinum, highlighted, grey hair
Brunette, dark brown, dark highlighted hair
Color wheel logicOpposite yellowOpposite orange
FeelGenerally gentler, more hydratingCan be stronger; pair with a rich conditioner
ResultsVisible after 1–2 washesVisible with consistent use
How often1–2x per week1–2x per week, less if hair feels dry

Blue vs Purple Shampoo: What’s the Difference?

Two Toners, Two Different Jobs

Purple shampoo is the go-to for blondes for a simple reason: its violet pigment sits opposite yellow on the colour wheel, so it neutralises yellow undertones and cancels brassiness on contact. In my experience, even one wash can visibly brighten blonde hair after a colour service.

Blue shampoo gets less attention, but it deserves more. Its blue pigment sits opposite orange on the colour wheel, targeting orange and red undertones common in brunette hair. If your colour looks warmer after heat styling, blue is the fix.

These two products aren’t interchangeable. Purple is built for light hair colours; blue is built for brunette and dark hair. Using one in place of the other typically just leaves you with brassiness you can’t explain.

How to Tell Which One You Need

The fastest way to figure out which shampoo fits your hair is to look at what your colour is actually doing between salon visits:

  • Turning yellow or brassy-gold? That’s a purple problem common in blonde, platinum, and highlighted hair.
  • Turning orange, copper, or reddish? That’s a blue problem common in brunette and dark, colour-treated hair.

I’ve used both back-to-back on clients, and the difference in outcome is immediate once you’re treating the right tone. Overusing either one, though, can overcorrect your colour, so start with a short application time (two to three minutes) and build up rather than leaving it on too long from the start.

How Often Should You Actually Use It

This is where most people either overdo it or don’t do enough. As a general rule, one to two washes a week is the sweet spot for both blue and purple shampoo, enough to keep brass at bay without stripping natural oils or overcorrecting your tone into an ashy or purple-grey cast.

A few things change that baseline:

  • Freshly bleached or lightened hair tends to grab pigment fast, so you may only need it once a week at first. Using it more can push blonde hair toward a lavender tint.
  • Naturally coarse or dry hair should lean toward the lower end too, and always follow with a moisturising conditioner the same day.
  • Hair that processes brass quickly (common with hard water or frequent heat styling) can handle two to three washes a week without issue.
  • Grey hair usually does well with purple shampoo twice a week, paired with a hydrating mask at least once in that same window.

The easiest way to dial this in is to watch your hair over two weeks. If brass creeps back before your next wash, add a session. If your colour starts looking flat, dull, or slightly purple/blue-tinted, cut back.

What to Look for on the Ingredient Label

Not all toning shampoos are built the same, and the ingredient list tells you a lot about how a formula will actually behave on your hair.

  • Pigment source matters most. Look for shampoos that list violet or blue pigments (sometimes shown as ‘colour additives’ like Blue 1 or Violet 2) fairly high on the ingredient list; that’s what determines how strong and how fast the toning effect will be.
  • Sulphates are worth checking for if your hair is already dry or damaged. Sulphate-based cleansers strip colour and moisture faster, which can work against you if you’re also trying to tone down brassiness. A sulphate-free formula is gentler and better for hair that’s already been through bleach or repeated colour services.
  • Hydrating additives like argan oil, shea butter, or keratin help offset the drying effect that pigmented shampoos can have with regular use. These are especially worth prioritising in a blue shampoo, since blue formulas tend to run slightly stronger than purple ones.
  • Protein or bond-building ingredients (like the kind found in bond-repair treatments) are a nice bonus for chemically treated hair, since toning shampoo alone doesn’t repair structural damage; it only manages colour.

Blue vs Purple Shampoo: Before-and-After Results

Which is better for colour-treated hair?

Blue shampoo is a newer category; it’s only gone mainstream in the last few years, but the formulas available now are far more refined than early versions. Purple shampoo, on the other hand, has been the default for longer, and purple formulas tend to be gentler and more hydrating overall. Hair that’s already prone to breakage or split ends usually responds better to purple than to a stronger blue formula.

Blue shampoo works well on dark or subtly highlighted hair carrying deep brass tones, but using it on hair that’s just been heavily bleached without following up with a hydrating conditioner is where people run into trouble. If your hair has recently been through a damaging colour process, check how it’s holding up before reaching for the stronger option, and always follow with a rich conditioner regardless of which toner you use.

Which Is Better for Grey Hair?

Blue shampoo is rarely the right call for grey hair. Grey tends to pick up yellow rather than deep orange, so blue is solving a problem your hair probably doesn’t have. Purple is the better fit here. Grey hair tends to be wiry and prone to frizz, and a good purple shampoo lifts that yellow cast while leaving strands looking cleaner and brighter. The bigger risk with grey hair isn’t which toner you pick; it’s drying formulas in general. 

Grey hair loses moisture fast, so pair whichever shampoo you use with a conditioner or deep mask at least once a week. Skipping that step is where grey hair starts looking rough and dull, regardless of the toner.

Best Purple Toners for Blonde and Grey Hair

UNITE Hair BLONDA Purple Shampoo

My first reach for cancelling yellow and brass without harshness. It’s sulphate-free, paraben-free, and colour-safe; rinses clean without residue; and won’t stain your hands or shower walls the way some stronger formulas do.

Davines Alchemic Conditioner

A toning conditioner rather than a shampoo, but it earns a permanent spot in blonde routines. The pigment is intense enough to shift tone in a single use, and it layers well after a purple shampoo step for extra shine and hydration.

Kristin Ess One Purple Conditioner

The budget pick that doesn’t feel like a compromise. It’s gentle enough for regular use and works well as a toning step on days you don’t want a full shampoo routine.

Fanola No Yellow Shampoo

A cult favourite among stylists for a reason: it’s a strong, fast-acting formula that works well on very brassy or previously bleached hair. Because it’s potent, this one is best used once a week rather than as a daily driver.

Redken Color Extend Blondage 

A slightly more hydrating alternative to stronger drugstore formulas, built specifically for colour-treated blonde hair that also needs UV and heat protection. A solid pick if your hair leans dry.

Pairing tip

Follow up with a leave-in conditioner (like 7SECONDS Detangler) for extra hydration and heat protection. Toning shampoos can be drying if used without a follow-up step.

Best Blue Toners for Brunette and Highlighted Hair

Aveda Blue Malva Shampoo 

A gentle, hydrating formula that makes highlights pop without stripping the hair. It costs more up front, but the bulk size stretches the price per wash down considerably.

Pureology Color Fanatic Top Coat

Technically a tone-depositing gloss rather than a shampoo, this is a strong pick for dark brown and black hair (level 1–2) that’s picking up brass. It adds shine and softness without requiring a full toning-shampoo routine.

Matrix Total Results Brass Off

A budget-friendly blue shampoo built specifically for brunette hair fighting orange and copper tones after colour services. It’s a solid entry point if you’re testing blue toning for the first time.

Joico Color Balance Blue Shampoo 

A slightly stronger formula that works well on dark, cool-toned brunette hair, particularly after balayage or highlights that have started pulling warm.

Pairing tip 

Aveda for the wash and Pureology for the gloss finish – together they cover both the toning and the shine step that brunette hair needs.

FAQs

Can I use blue and purple shampoo at the same time?

Not in the same wash and generally not on the same hair; they target opposite tones, so combining them can muddy your colour. If you have both blonde and dark sections (like a balayage), alternate instead: purple on blonde pieces, blue on roots or lowlights.

Will these shampoos change my natural hair colour?

No. Toning shampoos only affect colour-treated or lightened hair; the pigment binds to porous, processed strands. On untreated, natural hair, they typically have little to no visible effect.

Why does my hair look purple or blue-grey after using it? 

This usually means the product was left on too long, used too often, or applied to hair that’s already light enough that it doesn’t need much correction. Cut back to once a week and clarify with a gentle shampoo if the tint doesn’t fade.

Can I use toning shampoo every day? 

It’s not recommended. Daily use of a pigmented shampoo increases the risk of overtoning and can dry out hair faster than a standard shampoo would.

What’s the best purple shampoo for blonde hair?

A gentle, sulphate-free formula like UNITE Hair BLONDA or Redken Colour Extend Blondage.

What’s the best blue shampoo for orange hair?

Matrix Total Results Brass Off (budget) or Joico Colour Balance Blue (stronger, cooler tone).

What is the best blonde shampoo overall?

A sulphate-free purple shampoo that tones yellow and hydrates blonde hair needs both.

Conclusion

Purple shampoo fixes yellow tones best for blonde, highlighted, and grey hair. Blue shampoo fixes orange and red tones best for brunette and dark hair. Use the wrong one and you’re just wasting product. Stick to 1–2 washes a week, choose a sulphate-free formula if your hair is already dry, and always follow with a conditioner. Once you know your tone, the choice is simple.

Best Shampoos for Fine, Damaged Hair in 2026 (Top Picks)

1

Most people grab whatever’s on sale without a second thought, but for fine, damaged hair, that habit can make things worse. After years of testing on my own over-processed, colour-treated strands, choosing the right shampoo has become the foundation of my routine.

The best formulas hydrate the cortex of each strand while keeping the scalp clean and balanced. A heavy product leaves a greasy film on fine hair; a too-harsh wash strips moisture and triggers scalp irritation.

That’s where a rotating arsenal of clarifying and moisturising shampoos helps, especially for highlighted or chemically treated hair. Use a clarifying wash after workouts to remove buildup, and a daily moisturising wash with a weekly clarifying session to protect damaged ends over time.

Toning shampoos have also been a personal game-changer for keeping highlighted or lightened hair looking sharp between appointments. I swap mine in every few washes rather than daily – that keeps the tone balanced without overdoing it. If you’re unsure which one suits your hair best, this guide on blue vs purple shampoo for blonde hair breaks down the difference really well.

Best Shampoos for Fine, Damaged Hair in 2026

Davines NouNou Shampoo

This shampoo earns a permanent spot in your routine once you’ve tried enough others to know the difference. It’s deeply hydrating without ever weighing hair down rare for fine hair that needs moisture but can’t handle heaviness.

It’s also clean beauty–certified and gentle enough for regular use without stressing the scalp. The formula rinses out easily and leaves hair feeling genuinely fresh. I keep a bottle for travel, too; even harsh, extra-drying hotel water doesn’t strip the moisture out when this is in the mix.

Amika The Kure Bond Repair & Strength Shampoo 

For serious damage, breakage, frizz and colour stress, this is the first thing I reach for. Its bond-repair technology works deeper than a typical salon treatment, without drying out the scalp.

It’s also a solid clean-beauty option I rotate in after heavy styling weeks. A jumbo size is available online if you use it consistently, and for real damage, it’s worth the investment. I often pair it with Amika’s Melu for a fully hydrating routine.

Ouai Detox Shampoo

A detox shampoo sounds great until it leaves fine hair feeling like dried-out straw, which is exactly what most cheaper clarifying formulas do. Not every option on the market is built with fine, damaged hair in mind, so the formula matters more than the label.

Ouai gets the balance right: it clears buildup effectively while staying gentle enough to avoid serious dryness, something very few brands manage consistently. I reach for it about twice a month as a reset, pairing it with a gentle daily shampoo in between so already damaged hair never gets overloaded. For fine hair close to breakage, it’s the best clarifying option in its category right now.

UNITE Hair BLONDA Purple Shampoo

If brassy, yellow tones have crept in and a toning conditioner alone isn’t cutting it, this is the dedicated purple shampoo I reach for. It lifts unwanted warmth fast without leaving hair feeling stripped, unlike harsher purple formulas.

For lighter maintenance between washes, Aveda’s Blue Malva Conditioner is worth keeping on hand; it works as a subtle blue toner and adds moisture, which most toning conditioners skip. Used together, BLONDA handles the heavy lifting, and Blue Malva maintains day-to-day tone for a full toning system.

Amika Big Hit Volumising Shampoo

Fine, limp hair doesn’t just need moisture it needs volume that holds, not the midday collapse most volumising shampoos cause. This one’s different: a clean-beauty formula that lifts from the root while staying light enough to keep bounce all day.

Finding lift without dryness is genuinely hard, and this is one of the few that manages both. The scent is an unexpected win, too fresh without being overpowering. Whenever fine hair starts feeling flat again, this is my go-to.

Best Budget-Friendly Shampoos for Fine, Damaged Hair

Pantene Pro-V Daily Moisture Renewal Shampoo

A greasy film after washing usually means a shampoo isn’t doing its job; most budget formulas rely on cheap sulphates that strip moisture instead of supporting renewal.

At $12, this breaks that pattern. It gradually restores moisture with each wash instead of stripping it away, and even after months of use, it has never left a heavy film on fragile hair. The renewal effect is slow but real, especially paired with a weekly hydrating mask.

For colour-treated hair, using this daily and stepping back from harsher washes makes a noticeable difference proof that a non-damaging formula doesn’t have to cost much.

Herbal Essences Hello Hydration Shampoo

The idea that drugstore products can’t compete with premium ones has been disproven plenty of times, and this shampoo is one of the clearest examples. It’s held its ground for years as an affordable, reliable pick.

It’s easy to grab at any drugstore, and the hydration doesn’t feel watered down. I’ve rotated it alongside pricier picks like Amika, and the performance gap was smaller than expected.

Quick Comparison

ProductBest ForPriceClean Beauty
Davines NouNouDaily hydration, travel~$38Yes
Amika The KureDeep repair, breakage~$34Yes
Ouai DetoxBi-monthly clarifying reset~$34Yes
UNITE BLONDABrassy/yellow toning~$80No
Amika Big HitVolume without weight~$29Yes
Pantene Pro-VBudget daily moisture~$25No
Herbal Essences Hello HydrationBudget everyday hydration~$7No


Prices are approximate and can vary by retailer; worth a quick check before you buy.

How to Choose the Right Shampoo for Fine Hair

Most people focus on the brand name, but the ingredients list tells the real story.

  • Silicones like dimethicone coat the strands and build up over time, slowly weighing down fine hair and quietly killing volume.
  • Sodium lauryl sulphate (SLS) is a common surfactant in budget formulas; it lathers well but dries out the scalp, so it’s worth avoiding if your scalp is sensitive.
  • Botanicals like ginseng and ginger support the scalp and encourage lift at the root; several stylists have pointed to these plant-based ingredients as a driver of improved texture over consistent use.
  • Biotin and vitamin B5 build strength inside fine strands without adding weight, genuinely improving texture with regular use.
  • Hyaluronic acid hydrates strands from the inside, keeping fine hair from going stiff or flat as it air-dries, with body but without the crunch.
  • Oils are a double-edged sword: lightweight oils nourish dry ends and scalp without residue, while heavier oils collapse volume fast.
  • Fragrance is easy to overlook but matters for sensitive scalps; a heavily perfumed formula can trigger irritation, so unscented is often the safer choice.
  • Surfactants control lather and cleansing; a balanced formula lifts dirt and buildup without being overly drying, which is what separates a great shampoo from one that just smells good.

How We Tested the Best Shampoos for Fine Hair

Results only show up with consistent, structured use, not a single washday impression. Eight editors with a mix of hair types tested each product for six weeks, giving enough wash days to fairly judge how each formula held up over time.

Each shampoo was scored on lather quality, how thoroughly it cleansed, and how clean the strands felt afterwards. Testers with fine and thin hair specifically evaluated hydration, volume, thickness, and visible improvement.

The most consistent finding: a lot of shampoos promise fullness but quietly leave residue that flattens fine hair by the second wash day, a pattern that only became obvious over the full six weeks.

FAQs

What is the best shampoo for damaged hair?

The best shampoos for damaged hair contain reparative ingredients like keratin, biotin, argan oil, or bond-building technology (e.g., bis-aminopropyl diglycol dimaleate) that help rebuild the hair’s internal structure, reduce breakage, and restore shine.

What causes hair damage in the first place?

Common causes include heat styling, chemical treatments (colouring, bleaching, and perming), UV exposure, over-washing, harsh brushing, and environmental stressors like chlorine or hard water.

Should I use shampoo and conditioner together for dry, damaged hair?

Yes. Pairing a moisturising, sulphate-free shampoo with a nourishing conditioner (or deep-conditioning mask) gives better results than shampoo alone, since conditioner helps seal in moisture and smooth the cuticle after cleansing.

What ingredients should I avoid if my hair is damaged?

Avoid sulphates (SLS/SLES), high alcohol content, and heavy silicones, as these can strip natural oils or cause buildup that weighs down already fragile hair.

What’s the best shampoo for fine hair?

Lightweight, volumising shampoos without heavy oils or silicones work best for fine hair. Look for formulas labelled “volumising” or “weightless” that cleanse without flattening strands.

Can fine hair also be damaged or dry?

Yes, fine hair is often more prone to damage because it has less structural mass. A shampoo that balances lightweight volume with light hydration (avoiding heavy conditioning agents) works best for dry, fine hair.

How often should I wash damaged or fine hair?

2–3 times a week is generally recommended. Over-washing can strip natural oils and worsen dryness/damage, while fine hair can get weighed down or look greasy if washed too infrequently.

Are sulphate-free shampoos better for damaged hair?

Generally yes, sulphate-free formulas cleanse more gently, which helps prevent further stripping of moisture and protein from already-weakened hair strands.

Can the same shampoo work for both dry, damaged hair and fine hair?

It’s possible if the formula is lightweight yet moisturising (e.g., avoiding heavy butters/oils but still including proteins or panthenol), but for best results, choose a product specifically formulated for your dominant hair concern.

Conclusion

The right shampoo for fine, damaged hair balances hydration and volume without weighing strands down. Whether you choose a sulphate-free everyday formula, a budget-friendly pick, or a deep bond-repair treatment, consistency is key. Pair it with a good conditioner and occasional clarifying wash to keep fine, damaged hair looking healthy and full.

Best Blue Shampoo for Brunettes (Expert Picks)

2

A good blue shampoo does something most people overlook: it quietly targets brassy orange tones that sneak in and ruin your colour. If you’re a brunette with colour-treated or highlighted hair, you’ve probably watched those undesirable warm shifts take over without warning.

Most people still reach for a purple shampoo, but that’s designed for blondes. What actually makes a real difference for darker hair is a blue toner, one that’s built to cancel out both the brassy orange and stubborn red tones brunettes constantly deal with.

I’ve tested plenty of blue shampoos over the years, and the results are always noticeable within the first few washes. The blue tint in these formulas works against the color wheel to neutralize warmth and restore shine, something no regular shampoo can pull off.

Used as a hair toner in wash form, this type of product is highly effective at fighting dullness naturally, without stepping foot in a salon. It’s the smartest at-home move for anyone who wants healthier-looking color that lasts longer between appointments.

One thing experience has taught me is that blue toners can dry out your strands if overused, so always follow up with good conditioners. Thankfully, blue shampoos come across all price points, meaning there’s a key product out there no matter your budget.

What Is Blue Shampoo and How Does It Actually Work?

It all comes down to colour theory, specifically the colour wheel. Blue sits directly opposite orange on that wheel, which means blue pigment can cancel out the warm, brassy tones that show up in brunette hair over time.

A blue shampoo is formulated as both a cleansing product and a toning agent in one step. The moment you apply it, the pigment gets to work neutralising red and orange tones, something a regular shampoo simply isn’t intended to do.

What makes toning brown hair with this method so smart is how subtle it feels. You’re not doing a full-colour treatment; you’re just washing your hair and letting the blue pigment do the heavy lifting in the background.

From personal experience, the first time I used a blue shampoo instead of a standard one, the shift was quiet but real: less warmth, more depth. That’s what good toning is supposed to feel like.

Blue Shampoo Before and After on Highlighted Brown Hair (Real Results)

Best Blue Shampoo for Brunette Hair (Expert Picks)

Not every shampoo earns a spot on a curated list; only high-quality products that actually deliver real results make the cut. After testing bottles across every price range, a few names kept rising to the top.

Aveda Blue Malva Shampoo

It is one of those picks that keeps coming up for good reason. As a hair brand, Aveda has built its reputation on clean, plant-forward formulas that don’t trade performance for gentleness, and this one holds up.

The suds feel rich without being harsh, and the formula stays gentle on the scalp even with regular use. It’s particularly well-suited for wiry hair types that tend to tangle after washing and need a little extra care.

What I personally appreciate most is that it isn’t drying the way some toning shampoos can be. The shine it leaves is real and visible, not the kind that fades by day two.

If you wash your hair often, the bulk size option makes it far less expensive per use over time. That kind of value turns an already strong shampoo into an easy long-term commitment.

Pureology Colour Fanatic Coat + Tone Hair Gloss

The Pureology Colour Fanatic Top Coat + Tone Hair Gloss isn’t your standard shampoo; it’s a full treatment that pairs color correction with genuine conditioning in a single step. For anyone with dark brown hair stuck in a cycle of stubborn brassiness, that dual approach changes things fast.

The blue tint inside the formula cancels out warmth without pulling moisture out of the strand. That keeps the experience deeply hydrating, which you don’t always expect from a toning product at this level.

What I noticed after the first few uses was how the finish just felt different, visibly shinier, noticeably soft, and completely frizz-free in a way that a regular gloss rinse rarely delivers. It earns its place not just as a colour fix but as a full-care treatment that works harder than most single-purpose products on the shelf.

DPHUE Cool Brunette Shampoo

DPHUE Cool Brunette Shampoo earns its spot not by being trendy but by being quietly reliable. It adds a subtle tone with just the right amount of blue, enough to neutralise warmth without overdoing it.

The formula stays light, which makes staining your hands mid-shower a non-issue. That’s a small thing that matters a lot when you’re rinsing off a shampoo with active pigment in it.

What works especially well here is how carefully it treats the scalp; it’s never harsh, never drying, and doesn’t leave that tight feeling behind. For wiry hair types or strands that are heavily damaged and prone to breakage, that gentleness is genuinely important.

It’s also a thoughtful pick for anyone sensitive to strong smells; the scent leans fresh and clean without crossing into heavy fragrance territory. Even grey mixed into brown hair responds well to it with consistent use.

Pairing it with the Cool Brunette Conditioner is where the real shine comes through. Yes, it’s pricier than drugstore options, but what you get in return healthy, toned hair that actually looks cared for is hard to argue with.

Best Budget-Friendly Blue Shampoo for Brunette Hair in 2026

Great Toning Results Don’t Have to Cost a Fortune

The Matrix Brass Off Blue shampoo sits right around $20, and for what it delivers, that’s a genuinely budget-friendly entry point into serious toning. It neutralises warm tones without making your wallet flinch the way salon-grade options often do.

Where most affordable picks fall short is formula quality—too stripping, too drying, and too rough on color. This blue shampoo sidesteps all of that, leaving the strand intact while still doing the toning work it promises.

One trick I’ve used personally is mixing it with a normal shampoo to soften the pigment load on low-brassiness days. This makes a single bottle stretch further and keeps the formula feeling cost-effective across more washes.

The one thing to watch is hydration; active toning formulas can quietly pull moisture out over time. A good hydrating hair mask used once or twice a week keeps that from becoming a problem.

A solid mask doesn’t have to be pricey either; a $10 option from a jar used 12 times across a month adds very little to your overall spend. Paired together, the shampoo and the mask create a routine that punches above its price.

How to Choose the Best Blue Shampoo for Your Hair

Your hair type and texture matter more than most people realise when choosing a blue shampoo. A formula that suits fine, straight hair won’t always work for curly or coarse strands.

Match the Formula to Your Hair Condition 

Dry hair types need a shampoo loaded with conditioning ingredients and nourishing ingredients such as natural oils and antioxidants. These protect the health of the hair while the toning agent gets to work neutralising warmth.

Always look for hydrating, sulphate-free options that won’t strip moisture from the strand. A gentle formula is essential for both damaged hair and colour-treated hair that’s already been through enough.

Katelyn Ellsworth, a San Diego-based stylist at The Roslyn Salon, advises looking for bond builders and bonding formulas within your blue shampoo. These add strengthening properties that keep colour-treated strands from snapping or thinning over time.

Bataille, founder of a colour-focused brand, points out that natural hair and virgin hair tend to be more porous than chemically treated hair. This means pigment absorbs faster and deposits more intensely, so the strength of the formula needs to match the starting condition of the hair.

Dryness becomes a real concern for porous and colour-treated strands with frequent use of any toning product. Follow up every session with something deeply hydrating to keep that balance in check.

Factor In Your Hair Type and Exposure 

For natural brunettes with just slight warmth coming through from the sun, a lighter toning cleanser used once a week is more than enough. There’s no need to reach for a heavy pigmented formula when the brassiness is mild.

If your brassy tones are driven by hard water or chlorine exposure, you’ll need a stronger formula and more frequent use to fight back against that intense brass. Those environmental factors hit the underlying pigment harder than most people expect.

Sun-kissed bronze hair and regular sun exposure speed up colour fading over time. Using a targeted blue shampoo every couple of washes helps maintain your tone and slow that natural drift.

The natural warmth sitting in darker brunette hair behaves differently from the warmth in lifted or highlighted hair. Knowing your baseline helps you decide whether you need something intense or just a light toning agent to keep things in check.

Application Tip 

When applying, always leave the shampoo on for a few minutes longer than you normally would. This extra time helps the pigments penetrate the shaft fully, which is where the real toning shift happens.

FAQs

1. What is blue shampoo used for?

Blue shampoo is a colour-depositing shampoo formulated to neutralise brassy, yellow, or orange tones in blonde, gray, or lightened hair, using blue pigment (opposite yellow on the colour wheel).

2. What is the best blue shampoo for brassy hair?

The best blue shampoo for brassy hair typically contains a strong violet-blue pigment concentration, is sulfate-free to protect colour-treated strands, and includes nourishing ingredients like keratin or oils to prevent dryness.

3. Can you use blue shampoo on blonde hair?

Yes, blue shampoo is specifically designed for blonde, platinum, and light-lifted hair to counteract warm, brassy tones and keep colour looking cool and fresh between salon visits.

4. What does a blue conditioner do?

A blue conditioner deposits cool-toned pigment while conditioning, offering a gentler, leave-in-friendly alternative to blue shampoo for maintaining tone and moisture.

5. Does toning shampoo work on brown hair?

Yes, toning shampoo for brown hair helps neutralise unwanted orange or red undertones that can appear in brunette hair, especially after colouring or sun exposure.

6. What’s the best shampoo for brown hair with blonde highlights?

For brown hair with blonde highlights, a blue or purple toning shampoo works best on the highlighted sections to prevent brassiness while keeping the base brunette tone rich and balanced.

7. Is there a difference between toning shampoo for highlighted brown hair vs. all-over blonde hair?

Yes, highlighted brunette hair usually needs a lighter, more targeted toning formula since only sections of hair are lightened, while all-over blonde hair can handle more frequent, fuller-strength blue shampoo use.

8. What results can you expect from blue shampoo on brunette hair (before and after)?

Brunette hair with highlights typically shows reduced brassiness and cooler, more neutral highlight tones after a few uses, though results vary based on hair porosity and how light the highlights are.

9. What is blue toner, and how is it different from blue shampoo?

Blue toner is a more concentrated, professional-grade product designed for a single intensive treatment, while blue shampoo is a milder, repeat-use product meant for regular maintenance.

10. How often should you use blue shampoo or toning shampoo?

Most blue/toning shampoos are recommended 1–2 times per week; using it more frequently, especially on lighter blonde hair, can over-tone strands and create a grey or ashy cast.

Conclusion

Brassiness doesn’t have to be a losing battle for brunettes. A good blue shampoo, matched to your hair’s texture and needs, can neutralize unwanted warmth and keep your color looking rich between salon visits. Whether you choose a splurge-worthy pick like Pureology or a budget option like Matrix Brass Off, consistency and hydration are what make the real difference. Find the right formula, stick with it, and healthier, more balanced brunette hair is well within reach.

Best Lightweight Hair Masks for Fine, Damaged Hair

1

Millions of people with fine, damaged hair keep piling on products and over-investing in styling, still wondering why their strands feel worse each month. I did the exact same thing before I finally stripped back my routine and actually paid attention to what my hair was asking for.

The shift happened when I started using a lightweight hair mask consistently, once a week, with no skipping. Within a few weeks, the breakage slowed down, the shine came back, and my hair started behaving in a way it hadn’t in years.

Fine strands have specific needs that regular conditioning doesn’t address deeply enough. Every wash, heat tool, and tight style chips away at the structure. Restore-focused formulas are the only real way to stop that spiral.

Done right, deep conditioning works beneath the surface to prevent breakage and restore shine without requiring you to overhaul everything, and it supports scalp health too, something most people overlook.

Heat, humidity, and sun hit fine hair especially hard in warmer months, which is exactly when a lightweight mask earns its place with real conditioning without the heavy residue that drags fine strands flat.

You don’t need luxury pricing to get real results either. Whether you’re growing out damage or just maintaining healthy strands, the approach stays the same: prevent what you can and restore what’s already lost. Here’s what’s actually worked, broken down by hair type.

Quick Comparison: Masks by Hair Type

Prices below are approximate street prices at the time of writing (mid-2026) and vary by retailer and size. Always check the current price before buying.

ProductBest ForApprox. SizeApprox. PriceKey Ingredient
Christophe Robin Baby Blonde Nutritive MaskBlonde, toning8.4 oz~$53Almond butter, buriti oil
Clairol Shimmer Lights ConditionerBlonde, brassiness16 oz~$15Purple pigments
Hask Blue Chamomile & Argan Oil ConditionerBlonde, between-wash leave-in12 oz~$9Blue chamomile, argan oil
OGX Coconut Curling ButterCurly, lightweight hydration6.6 oz~$8Coconut oil, honey
Pantene 3 Minute Miracle Deep ConditionerColor-treated, quick fix6 oz~$6Pro-V complex
Kiehl’s Nourishing Olive Fruit Oil ConditionerColor-treated, hydration6.8 oz~$24Olive fruit oil, avocado oil
Oribe Gold Lust Transformative MasqueColor-treated, intensive repair5 oz~$68Plant collagen, biotin
Carol’s Daughter Smoothie Deep ConditionerCoarse, curly, weekly ritual8 oz~$10Shea butter, mango, banana
L’Oréal Total Repair Damage Erasing BalmFine, structural repair6.8 oz~$8Ceramides, sweet almond oil
Briogeo Don’t Despair, Repair! MaskBeginners, all hair types8 oz~$38Rosehip oil, biotin
Hair Chemist Macadamia Oil Deep Repair MasqueBudget, rinse-out or leave-in16 oz~$10Macadamia oil

Blonde Hair

Blonde is one of the most demanding colour commitments you can make. Stretch four months between salon visits and highlights go brassy, roots clash, and nothing looks intentional anymore.

I’ve lived that cycle more times than I’d like to admit, and the fix was never a single product; it was building a small, deliberate routine around what gets lost between appointments. Roots and ends deal with different levels of damage at once, so a lightweight, nutritive mask needs to address both without flattening fine strands a balance most products miss.

The Christophe Robin Baby Blonde Nutritive Mask earns every mention. It’s genuinely nutritive, keeps tone cool without weighing hair down, and delivers a richer finish on highlights. I used it for four months and the results held up.

For a low-cost alternative, Clairol Shimmer Lights is a drugstore staple for good reason; use it as a quick conditioner or a longer leave-in when brassiness digs in. The Hask Blue Chamomile Conditioner also deserves credit at roughly six dollars, it’s gentle enough for between-wash use and keeps streaky results at bay.

The science: cobalt andpurple sit opposite yellow and orange on the colour wheel, which is why these formulas neutralise brassiness. Timing matters too short does nothing, too long turns highlights murky.

Argan oil isn’t for toning, but it smooths texture afterward without the stiffness heavier masks leave behind. Scent matters too — my first purple mask smelt so harsh I kept skipping it, defeating the purpose. Once I found one that smelt pleasant, I stuck with it, and consistency is what actually holds tone over time.

Layering a leave-in over your toner, rather than choosing one, makes managing fresh roots much easier. It won’t replace a salon visit, but it keeps things looking deliberate, not grown-out.

Curly Hair

Curly hair runs on its own rules it dries out faster and reacts very differently to product weight than straight hair. What works for fine, straight strands can collapse curls entirely, and I learned that the hard way before understanding what my curl pattern needed.

Haircare content online doesn’t help either. Every scroll surfaces a new curl enhancer or rinse-out treatment promising quick definition. I chased a lot of those claims before getting selective. OGX Coconut Curling Butter was one of the few that held up past the hype. The coconut base delivers real conditioning without leaving curls stiff or crunchy, and the softness lasts well into day two.

A couple of Glossier products were slightly disappointing for my curl pattern; they leaned more toward conditioner than mask, without enough structure for what my curls needed. That pushed me toward layering properly. A hydrating rinse-out followed by a lightweight leave-in consistently outperformed any single product on its own Pairing it with a light oil afterward kept curls defined by the next morning.

The rinse-out step is where the real work happens. A mask left on long enough to absorb builds the moisture foundation any curl enhancer applied afterward depends on. The Glossier Lift leave-in works best not as a standalone fix but as a finishing layer once the mask is fully rinsed out adding just enough hold without making curls feel coated or heavy.

Layering a conditioner, mask, and light oil sounds like a lot, but for curly hair it’s the baseline, not a luxury. Deep conditioning isn’t an occasional reset it’s what keeps curl pattern from unravelling between washes.

Colour-Treated Hair

Dyed hair is structurally different. Once bleaching begins, the bonds holding strands together break down — leaving brittle ends, faster colour fade, and hair that loses moisture quicker than it can hold it.

Colour damage doesn’t hit all at once; it’s a slow burn. The first sign is usually that squeaky-clean feeling right after washing which sounds fine until you realise your hair’s been stripped of everything it needed to stay intact.

The Pantene 3 Minute Miracle Hair Mask is the most efficient budget pick I’ve come across in just a few minutes, it leaves dyed hair noticeably softer and shinier without weighing fine strands down.

The Kiehl’s Olive Oil Hair Pack earns its place differently the olive oil base works as a serious hydrating treatment, reaching where colour damage runs deepest, with a post-rinse feel that’s smooth, not slippery.

Then there’s Oribe. The packaging signals something before you’ve even opened it, and the formula lives up to it, delivering real repair that other masks only partially address.

One habit changed everything: applying right after towel-drying instead of onto dripping wet hair. The difference in absorption was immediate.

For colour-treated strands, deep conditioning isn’t optional it’s the baseline that keeps broken ends from defining the whole look. Colour damage responds to consistency more than price; a lightweight mask used weekly will always outperform an expensive jar that only comes out once damage is already in crisis.

Coarse Hair

Coarse hair doesn’t respond to half-measures. Heat, salt sprays, chlorine, and sun stack up on already resistant strands, leaving hair rough no matter what’s layered on top. Unlike fine hair, coarse strands need real time and intensity to shift.

The difference between a forgettable product and an actual turning point often comes down to application. Most people apply a mask onto dripping-wet hair and wonder why results disappoint the product never gets a chance to absorb before it’s diluted. Shampooing first, then applying to damp, not soaked hair, is the baseline that makes everything else work.

Carol’s Daughter Smoothie was the first mask that changed what I thought was possible for coarse, damaged hair. The texture and scent are almost dessert-like gimmicky-sounding until the result proves something real happened.

I treated it as a weekly ritual: a generous scoop, one full hour, letting the process run its course. That extra time was the difference between nourished hair and just conditioned hair the results weren’t even close.

After rinsing, my strands felt genuinely silky not sticky, not heavy, not coated with residue. It’s the feeling of healthy hair you forget is possible once damage has been your normal for too long. Whether I air-dried or heat-styled it afterward, the results held up the same way both times.

For curly or damaged hair that also falls into the coarse category, lightweight masks like this solve a problem heavier, greasier options only create differently hydration lands without the weight coarse hair almost never gets.

The price sits well below higher-end masks promising similar results, making it easy to use consistently rather than rationing it. Finishing with a light mist of rosewater afterward adds a final softening layer that locks in hydration without disturbing the conditioning already in the ends.

Fine Hair

Fine-haired people live by one rule: if the product is too heavy, it’s already failed before the morning begins. One layer too thick, and the whole style collapses the margin is small, and most formulas miss it.

The L’Oréal Total Repair Damage-Erasing Balm earns its name without needing to oversell it. Built around ceramides and sweet almond oil, it works at a structural level for actual repair, not just surface coating.

I first came across it through an offhand mention in a beauty review the kind of understated endorsement that carries more weight than a full campaign. My expectations were modest, but the balm-like texture surprised me from the first use. A single dollop spread evenly from root to tip without any rubbing required the kind of efficiency fine hair responds to best. Over-applying is the one mistake that turns a good mask into a greasy regret.

After rinsing, the almond oil and ceramides left real slip without buildup a soft, unfrizzy curl on wavier sections and a quietly bodied finish on straighter parts. Getting both outcomes from one balm wasn’t something I expected.

A windy commute used to undo everything by mid-morning. Once this balm became a weekly habit, that stopped being something I had to think about my hair held its shape by the end of the day, with natural movement that usually disappears by noon.

The formula doesn’t carry a fake, lingering perfume it’s clean during the rinse, neutral once dry, exactly the goal for a mask meant to disappear into the routine. That balance is what makes it work so well for fine hair: airy enough to feel like nothing, effective enough to function like everything.

The One Hair Mask I’d Recommend to a Beginner

Understanding the difference between daily conditioner and a dedicated mask is the first real shift in fine haircare. Wash frequency decides how often a mask should be used; someone washing daily has different moisture needs than someone washing weekly or monthly.

The Briogeo mask is the best beginner pick; it works across hair types, so you don’t need everything figured out before starting. Hair porosity is what most beginners skip, yet it explains why one mask absorbs beautifully while another just sits there. Low-porosity hair needs warmth and time to open up and absorb moisture; high-porosity hair does the same in half the time.

If you have wavy or straight hair, you’re likely low-porosity; it looks fine on the surface but stays dry underneath. Weekly deep conditioning versus monthly makes a clear difference in how hair falls and holds shape.

After my first proper Briogeo session, the slip was unlike anything from a regular conditioner, and the difference in hair health was visible even before it dried. Starting with sample sizes is a smart move; it lets you test how a treatment responds to your porosity and texture before committing your full budget.

A mask routine doesn’t need to be complicated, just consistent and matched to your hair type. One solid mask used at the right frequency beats cycling through five products with no real routine behind them.

Best Budget-Friendly Hair Masks for Fine, Damaged Hair

Spending more doesn’t always mean getting more nowhere clearer than in budget haircare. After testing both ends of the price spectrum, the products I keep coming back to aren’t always the ones in elegant packaging.

The Hair Chemist Macadamia Oil Deep Repair Masque is my first recommendation when the budget is tight but the damage is real. At around $10 and easy to find, it removes every barrier to trying it.

I’ve used it well over 20 times across different seasons and damage levels, and the quality has stayed consistent a reliability you wouldn’t expect at this price point.

The macadamia oil base separates it from generic options at a similar price it penetrates rather than coats, so repair happens inside the strand, not as a surface film. It’s thicker than most affordable masks but rinses out cleanly without residue a balance most budget treatments never get right.

For best results, applying it on back-to-back days after heat or chemical damage gives conditioning a real chance to rebuild what’s lost. It also works as either a rinse-out or leave-in most affordable masks lock you into one method, so having both is especially worth it.

Across every affordable mask I’ve used, this one earns its place through pure, repeatable results the kind that makes you quietly stop browsing for something better.

FAQs

What is the best hair masque for fine hair?

A lightweight, protein-and-oil-based masque works best for fine hair, something like the L’Oréal Total Repair Damage-Erasing Balm or a similar ceramide-based formula. Heavy butters and silicone-rich masks tend to weigh fine strands down, so look for “lightweight” or “soufflé” texture labels specifically.

What is the best deep conditioner for fine hair?

The best deep conditioners for fine hair are ones that add slip and moisture without leaving residue Briogeo and L’Oréal Total Repair are strong picks because they absorb quickly and rinse clean, rather than sitting on the hair shaft.

What is the top-rated hair mask for dry hair?

Top-rated options for dry hair usually combine intensive oils (olive, macadamia, or almond) with longer sit times. Kiehl’s Olive Oil Hair Pack and Hair Chemist Macadamia Oil Deep Repair Masks are both well-reviewed for restoring moisture to dry, dehydrated strands.

How is a hair mask for thin, fine hair different from a regular mask?

Masks for thin, fine hair are formulated to be lighter in texture and lower in heavy emollients, so they condition without flattening volume. Regular masks, especially those made for coarse or curly hair are often too rich and can leave fine hair looking greasy or limp.

What are good hair masks for damaged hair overall?

Good masks for damaged hair focus on rebuilding the hair’s internal structure, not just softening the surface. Ingredients like ceramides, keratin, and plant proteins do this well. Oribe’s Gold Lust Masque and Carol’s Daughter Smoothie are both built around repair rather than surface shine alone.

What’s the best hair mask for fine, curly hair specifically?

Fine curly hair needs hydration without weight, so a rinse-out mask followed by a light leave-in oil works better than an all-in-one heavy butter. OGX Coconut Curling Butter, used sparingly, is a solid option for this combination.

Conclusion

At the end of the day, the right hair mask isn’t about price or packaging; it’s about matching the formula to what your hair actually needs. Blonde hair needs tone correction, curly hair needs weightless hydration, colour-treated hair needs consistency, and fine hair needs restraint. Whatever category you fall into, the biggest shift usually comes not from finding one “miracle” product, but from actually using a mask every single week without skipping.

Start with one solid pick from your hair type, give it a few weeks, and let your strands tell you if it’s working before you chase the next big thing.

Ouai Hair Gloss In-Shower Shine Treatment: Honest Review

2

Ouai has been on my radar for a while, but it was the Hair Gloss In-Shower Shine Treatment that finally made me pull the trigger. I was curious and slightly sceptical, especially after seeing mixed reviews scattered all over beauty forums.

This is my full review after using it for almost half a year, with real before and after results that actually tell the story. I am a genuine fan of in-shower products that don’t demand extra steps – just apply during your daily wash routine and move on.

The treatment works from the inside out, delivering real hydration and softness in a quick 5-minute session, repeated a few times a week. It helps revive your hair colour, especially if you have highlighted or colour-treated hair, leaving everything looking polished and low-maintenance.

What sets it apart from other gloss formulas is how well it holds up when you heat style regularly. With the right tips and tricks, including proper heat protection, the shine can last anywhere from 8 to 12 weeks without going harsh on your strands.

Ouai In-Shower Hair Gloss Review: Pros, Cons & Performance

The Ouai Hair Gloss In-Shower Shine Treatment quietly became my secret weapon for salon-level shine without constant appointments. After 6 months of experimenting, I can say this brand genuinely delivers on what it promises.

As a beauty girl who has cycled through plenty of favourite hair products, I was doubtful at first, especially for fine hair that easily goes greasy or loses volume. The big results, though, changed my mind pretty fast.

The instructions are simple: after shampooing, apply it like a conditioner, leave it for 5 minutes, and rinse. It activates with water and warmth, leaving hair glossed, detangled, and completely free of tangles.

At $34, it won’t put a serious dent in your wallet and the product goes a long way. One bottle stretched well across 6 months of regular use without running low too quickly. Anyone worried it might weigh down their strands will be relieved this combo of hydration and gloss keeps volume alive. Hair feels noticeably softer, looks shinier, and stays hydrated right into the next day.

It’s easy to use, asks for minimal effort, and the softness it delivers is real, especially for dry or colour-treated hair craving a visible colour boost. Using a hot tool afterward is smoother too, thanks to the built-in heat protection working quietly in the background.

The finish is sleek and put-together, making it a perfect fit for both everyday low-maintenance beauty rituals and special events alike. I highly recommend it to anyone who wants that freshly soft and shiny look without dragging themselves back to the salon.

Pros

  • Hyaluronic acid is the ingredient doing the real work here. It pulls moisture into the hair shaft rather than just coating it. The hydration you feel is genuine, not a surface trick. Hair comes out noticeably softer after just one use, without feeling heavy or coated. The texture feels healthier and easier to manage from the first wash. That alone made me want to stick with it.
  • The formula is completely safe for colour-treated hair, which matters more than most people think. It doesn’t strip or dull your highlights; it actually makes them look more alive. My tones looked fresher without any extra effort.
  • It takes only 5 minutes in the shower, which makes it easy to stay consistent with. No complicated steps, no waiting around. Apply, rinse, done. The routines that stick are usually the simplest ones. Built-in heat protection is a quiet but genuinely useful bonus. You can style after washing without reaching for extra products. It keeps the routine tight and the strands guarded.
  • The shiny finish isn’t greasy or artificial-looking; it reads as healthy and natural. That gloss holds up well into the next day or two without dulling. The staying power is what makes it stand out. It performs consistently across all hair types, which not every gloss product can honestly say. Fine, thick, wavy, or curly, the results hold up. No texture is left out.
  • After blow-drying, hair is honestly SO shiny it looks freshly done at a salon. That mirror-like finish from a shower product is hard to believe until you see it. It’s the kind of result that genuinely surprises you.

Cons

  • The floral scent is pleasant at first but can feel overpowering mid-shower. Some people with scent sensitivity may find it a little strong. It’s worth knowing before committing to regular use.
  • It is not a true conditioner replacement, even though it can feel like one after rinsing. Tangles can still show up, especially on thicker or longer hair. Pairing it with a separate conditioner on some wash days makes a noticeable difference.
  • Applying too much product is an easy mistake, particularly when starting out. It can quickly weigh down finer strands and leave them looking greasy by the end of the day. A small amount spread evenly works far better than a generous one. handful.
  • Focusing product on the top half of the hair rather than just the ends tends to cause the most buildup issues. The roots get weighed down and the scalp feels heavy faster. Keeping it mid-length to the ends gives cleaner, lighter results.
  • For anyone hoping this treatment will help hold a curl, results may fall short of what’s advertised. It softens and smooths, but it doesn’t do much to support curl definition or structure. Those with wavy or curly hair may need additional styling support to see the finish they’re expecting.

Ouai Hair Gloss In-Shower Shine Treatment Before and After Results

The Right Way to Use Ouai Hair Gloss In-Shower Shine Treatment

  • Start with a clean wash before anything else. The gloss absorbs better into freshly shampooed hair that isn’t weighed down by buildup. Skipping shampoo first reduces how shiny the final result actually looks.
  • Use only a pea-sized amount; this is where most people go wrong. It’s very easy to overdo it, especially when the product feels lightweight at first. Using too much is the fastest way to weigh down finer strands.
  • Work the product through sections so it spreads evenly from mid-length to ends. Using your hands to distribute it first, then following with a wide-tooth comb to comb through, gives the most controlled application. This is especially important for fine hair that clumps easily.
  • Let it soak in and work its magic for a full 5 minutes before rinsing. Rushing this step cuts the results short. Those few minutes are what separate flat results from genuinely shiny, healthy-looking hair.
  • Once the time is up, fully rinse out every trace before stepping out. Any leftover gloss Sitting on the scalp can make roots look greasy by the next morning. A thorough rinse is just as important as the application itself.
  • Follow up with your regular conditioner if your ends still feel rough or tangled poorly. The gloss is not a full conditioner swap on every wash day. Layering both when needed keeps texture smooth without overdoing either product.
  • For best results, use it every three washes rather than daily. This spacing gives you a week’s worth of shine without product buildup taking over. The website actually recommends a similar frequency, and from experience, it holds up well within that window.
  • If you plan to heat style after washing, let your hair dry slightly before reaching for any tool. The gloss already provides a base layer of protection, but applying heat too quickly while soaking wet reduces the shine payoff. Waiting just a few minutes makes the finish look far more polished.

Ouai Hair Gloss In-Shower Shine Treatment: Is It Really Worth the Price?

At $34, the Ouai Hair Gloss In-Shower Shine Treatment sits in a middle ground, neither budget nor luxury. Compared to a salon appointment that runs 1-2 a month, this at-home treatment is genuinely cheaper over time. The value becomes obvious once you stop framing it as a product cost and start seeing it as a self-care ritual.

For colour-treated hair or natural hair that needs a visible colour boost, this delivers without the damage that comes with UV damage and repeated heat exposure, especially during the summer months. The hydration it adds gives strands that polished, put-together finish that usually only comes from professional treatments.

It goes a long way per use, which matters when you’re stretching a bottle across several weeks. A small amount gives that extra shine and boost that makes hair look styled even with workout clothes and a casual day. That kind of quick, easy result genuinely earns its place in a routine.

The pop of shine it adds is noticeable enough to feel like a confidence boost without overdoing it. Around the holidays especially, when everyone wants hair to look polished and effective without extra effort, this becomes a quiet go-to. You can grab it on Amazon, Sephora, or Revolve depending on where you already shop. Honestly, worth it.

Ouai Hair Gloss In-Shower Shine Treatment: Is It Safe for Curly & Coily Hair? 

Curly and coily textures need hydration more consistently than most, and slotting this in as an add-on treatment after shampoo fits naturally without disrupting anything. It doesn’t replace the steps already working; it just quietly improves what comes after.

The gloss works alongside your existing conditioner rather than competing with it, which matters for curlier textures that need both moisture and definition intact. Layering them on the same wash day is something I’ve tested personally, and the results felt balanced rather than heavy.

What curly hair actually gains from this is an extra boost of shine that coily patterns don’t always hold onto after drying. The reflective finish adds visible life to curl definition without stiffening or altering the natural movement of the strands.

Fitting it into a regular hair routine is straightforward: use it after shampooing, let it sit, and rinse before your conditioner step. It also helps detangle mid-shower, which anyone with tighter curl patterns will immediately appreciate. That alone makes it feel like a practical addition rather than just a cosmetic one.

FAQs

What is OUAI Hair Gloss?

It’s an in-shower treatment that adds shine, softness, and heat protection while helping protect colour from fading and treating damage. It’s applied after shampooing (and conditioning, if needed), left on for about 5 minutes, then rinsed out.

How do you use OUAI Hair Gloss?

Shampoo as usual; condition if you need to, then section hair and apply a pea-sized amount from mid-shaft to ends. Comb through, leave on for 5 minutes, then rinse. Curly/coily hair types are advised to treat it as an add-on step after their normal routine rather than a conditioner replacement.

How long do the results last?

OUAI states results last up to 3 washes when used as directed, though several reviewers reported the shine lasting closer to a week, even with daily washing.

Can you use too much product?

Yes, OUAI’s own FAQ confirms overuse is possible, and reviewers note using too much (or not rinsing thoroughly) can leave hair feeling greasy or stringy. A little goes a long way.

Do you need conditioner before applying it?

OUAI’s directions say conditioner is optional depending on hair type, but multiple reviewers found a light conditioning step first helped detangle hair and prevented an oily/stiff residue after rinsing.

Does it work with heat styling?

Yes, it includes heat protection up to 450°F/232°C, and the brand recommends styling with heat afterward, saying it enhances the shine payoff rather than the reverse.

Can it be paired with other OUAI products (like Detox Shampoo)?

Yes, OUAI recommends applying Hair Gloss on detox shampoo days to extend how long the shine lasts.

Is it safe for colour-treated hair or all hair types?

Yes, it’s marketed as safe across hair types, including colour-treated hair, and is formulated with hyaluronic acid, panthenol, and rice water. It’s paraben, phthalate and sulphate-free.

How much does it cost and how big is the bottle?

Around $34 for a 6 oz (177 mL) bottle. Reviewers note a little product per use makes one bottle last several months to over a year.

Is “Gloss+” the same as OUAI Hair Gloss?

No Gloss+ is a separate product from the brand dpHUE, a color-depositing/conditioning gloss. It’s a different brand entirely, just in the same “hair gloss” category as OUAI’s.

What’s the difference between OUAI Hair Gloss and OUAI’s Treatment Masque?

The Treatment Masque focuses on hydration and strengthening, while Hair Gloss is built around shine, damage treatment, and heat protection.

Conclusion

Six months in, the Ouai Hair Gloss In-Shower Shine Treatment still delivers shinier, softer hair with zero extra effort. It’s not a conditioner replacement and needs a light hand to avoid buildup, but for $34 a bottle that lasts months, it’s an easy, affordable way to get salon-level shine at home. Worth it.